This article will guide you through adding a Progress section to your Activity Landing Page (previously called the Event Page). If you are just starting to design your Activity Landing Page, you will likely want to start here.
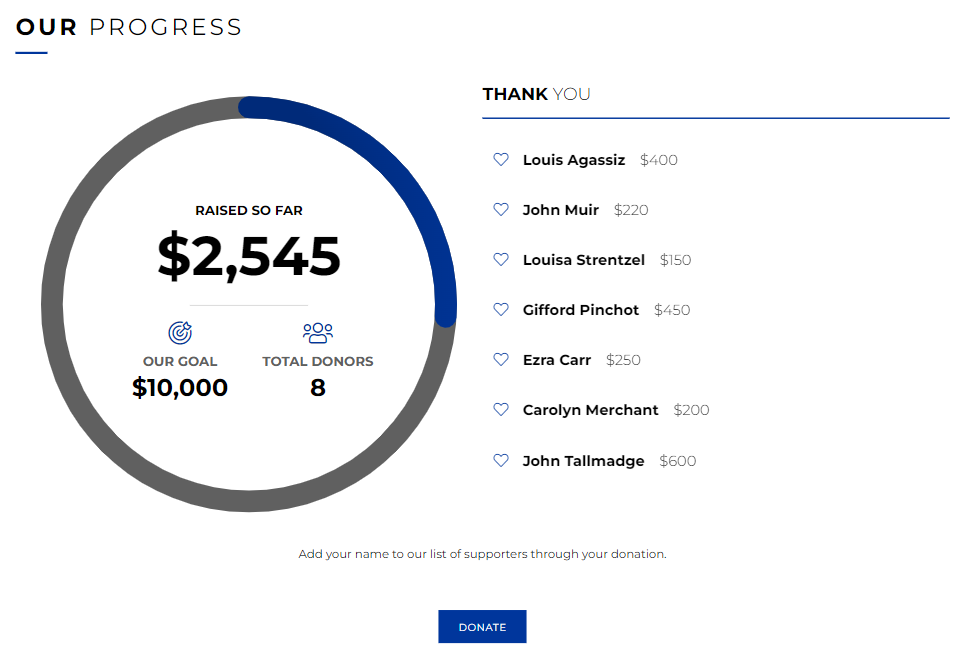
Include a Progress section in your Activity Landing Page with a dynamic amount raised, a progress circle that fills as you get closer to your goal, and a donor wall to thank all your donors right on your Activity Landing Page.

The Progress section is an optional section you can add to your Activity Landing Page. With it, you can have an embedded web page equivalent of your Fundraising Thermometer right on your Activity Landing Page, including a donor wall. In fact, the Progress section uses the same information from your Thermometer page.
You can personalize the Progress section to include or exclude the progress bar and the donor wall so you can create the exact experience you desire.
Add the Progress Section
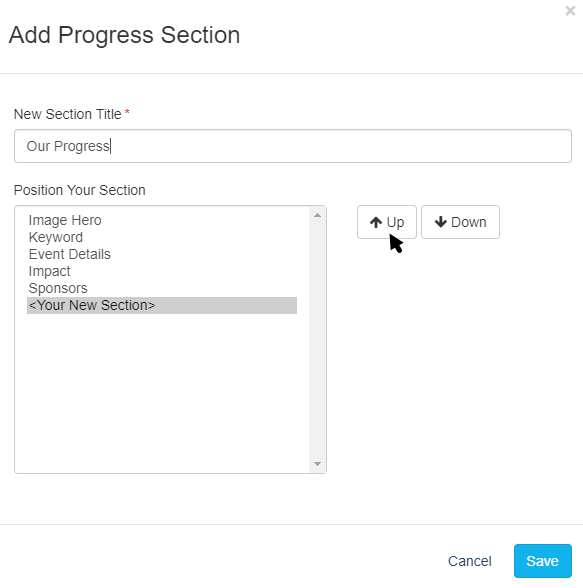
The Progress section is an optional addition to your Activity Landing Page. To add it, click the Add Section button in the upper right of your Activity Landing Page designer and choose Progress.

You will need to name the section, and then you can initially place it in the order you desire. If you want to move it to a different part of the page, you can do so later as described here.
You will then see your Progress section on your Activity Landing Page and the option to edit it within your Activity Landing Page designer.
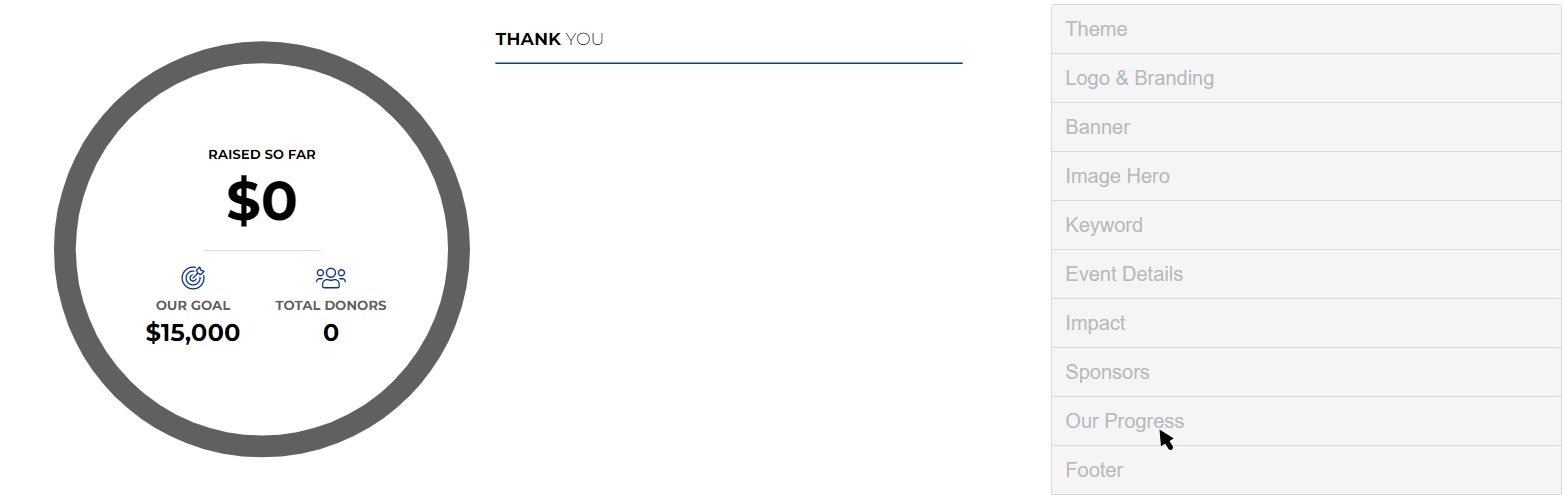
Now that you have a new section, you can personalize it.
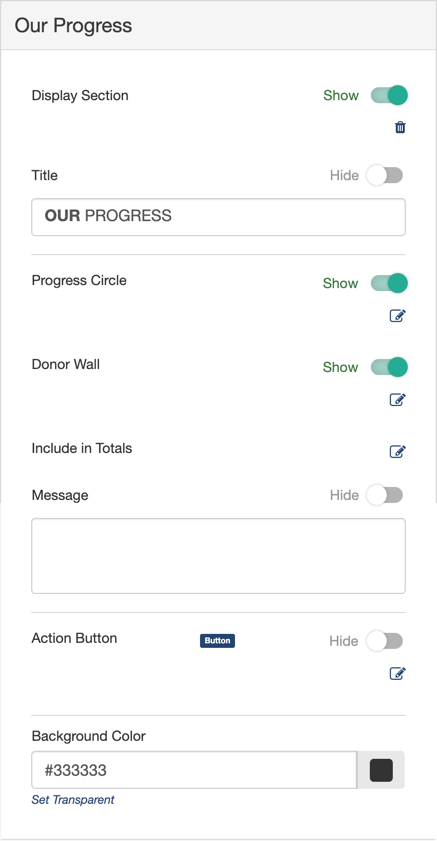
Display Section
If you decide against using the Progress section, you can hide it with the Show/Hide switch.
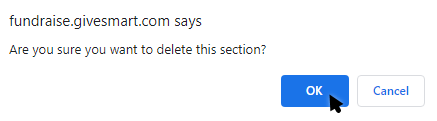
You can also delete the section by clicking the Trashcan icon if you decide not to use it at all. If you delete it, you will be shown a confirmation box before it completes the deletion
Title
You don't need to use a title, so the Title is hidden by default. If you want a title, switch the Show/Hide switch to show.
You can edit the Title to be anything you wish and include different formatting. You can also choose other variables from the drop-down list.
Progress Circle
If you don't want the Progress Circle, you can hide it. Maybe you just want the Donor Wall. If you hide the Progress Circle, then the Donor Wall will automatically be centered in the section.
Otherwise, you can edit the Progress Circle by clicking the Edit icon.
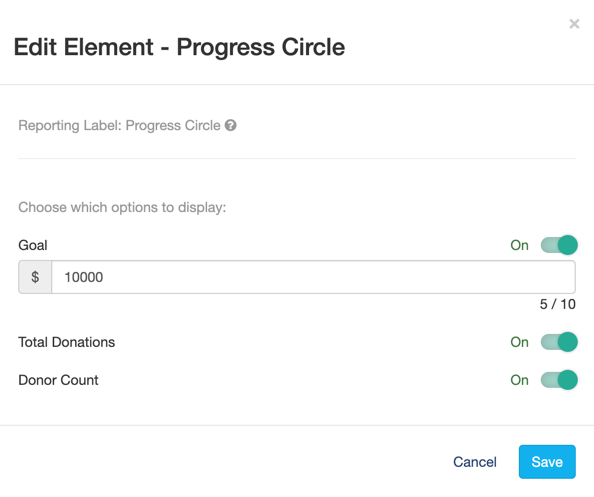
Here, you can choose to show the goal with the On/Off switch, and edit the goal amount.
You can Show/Hide the Total Donations.
You can Show/Hide the Donor Count.
Make sure to click Save if you make any changes.
Donor Wall
If you don't want the Donor wall, you can hide it with the Show/Hide switch. If you hide the Donor Wall, then the Progress Circle will automatically be centered in the section.
Otherwise, you can edit the Donor Wall by clicking the Edit icon.
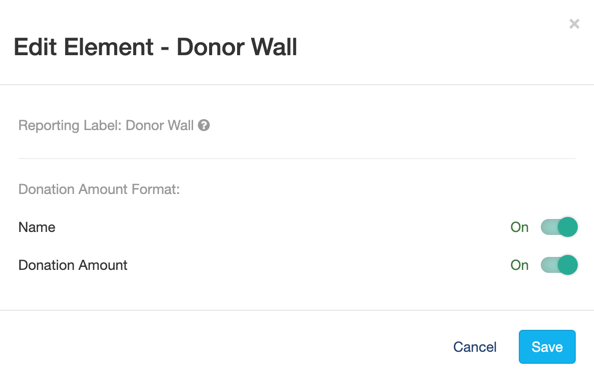
You can Show/Hide the donors' names and the amount they have donated.
Make sure to click Save if you make any changes.
For more information on the Fundraising Thermometer, click here.
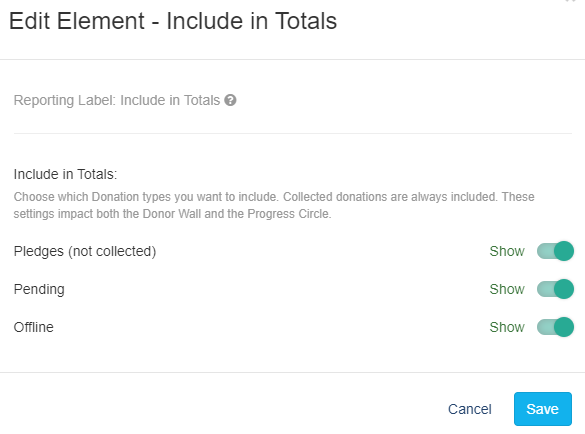
Include In Totals
This allows you to determine what you want to be calculated in your Progress Circle. Collected donations are always included.
By default, it will also include:
Pledges (not collected): those who have texted in an amount, but have not completed their donation through the donation form.
Pending: those who have submitted their donations via credit card, but the credit card has not been processed. It can take up to 24-48 hours.
Offline: those who have donated by check or by cash and you have entered them using the Enter Offline Donations category on the left. You can enter them individually or in bulk.
Message
The Message section is typically used to alert supporters to the Donate button, inviting them to join in on the progress. Although, it could be used for anything! Consider a custom thank you message to your donors or a celebratory statement, cheering on the progress.
If you do not want to include a message, you can use the Show/Hide switch to remove it from your Progress section.
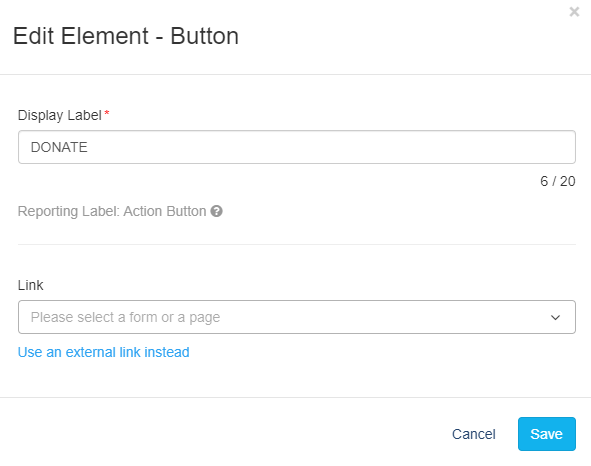
Action Button
The Action Button is listed generically because it can be customized. It is primarily used to encourage donations, an invitation for donors to join in on the Donor Wall and see the progress increase.
If you do not want to include the Action Button, you can use the Show/Hide switch to remove it from your Progress section.
Click the Edit icon to change the label on the button and to link it to any of your forms, pages or even an external link.
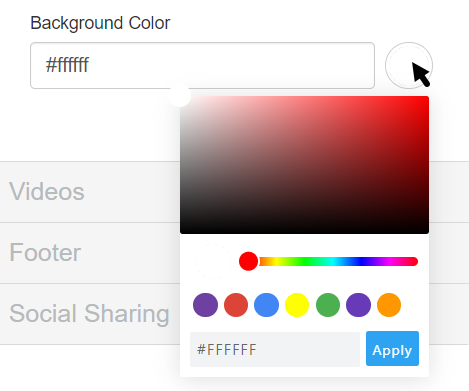
Background Color
The Background of the Progress section starts as dark grey (hex code #333333) for the Dark Theme and white (hex code #ffffff) with the Light Theme.
To change the Background Color, enter a color's hexadecimal code or click on the color picker and select the color of your choice by using the color bar or dragging the circle around the color field. There are also default colors you can select or use as a starting point. Once you've selected a color on the color picker, click apply.
Now your Progress section is ready to go, perfect for days of giving, virtual events and more.