This article describes the specific settings to set up the sponsorship portion of a Corporate Sponsorship activity. You will need to prepare the rest of the form using the Corporate Sponsorship Activity Design article which includes key items to add to every Corporate Sponsorship form.
This design of a Corporate Sponsorship form uses a manual creation process. The manual creation method is probably the most complex, but allows for the most options in the shortest space on the form: Create calculated fields, dropdowns of levels and dynamic actions to show "as needed" descriptions in this method.

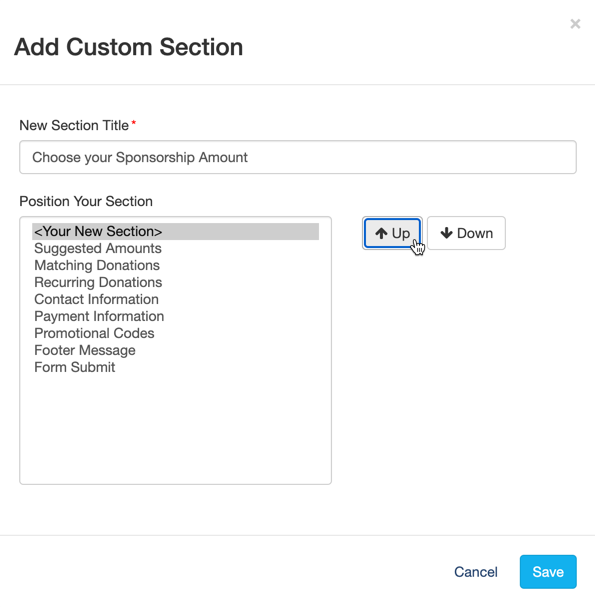
Add a New Section Above Suggested Amounts
- Click Manage Sections in the upper left
- Click Add Custom Section

- Name your section, for example, "Choose your Sponsorship Amount"
- Use the Up/Down Arrows on the right to place it at the top of the sections, specifically above the Suggested Donations.
Add Description
- Open the newly created (empty) section
- Create a title to be displayed on the form in the Section Heading area
- This will not appear on the form until at least one element is added to the section.
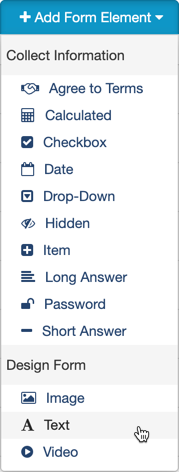
- If desired, use the Add Form Elements button to add Text and/or Images to describe what to do and the levels of sponsorship you offer, what will happen next or anything else you may want to add.
 Note: It is generally recommended to have an actionable item visible on the page so try to have at least one of your sponsorship levels visible on the form when it is first opened. Add an Item Form
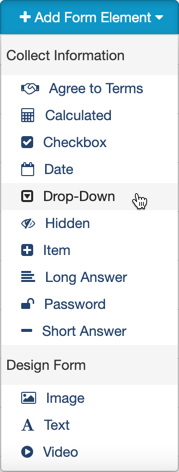
Add Sponsorship Levels with a Drop-Down
- Use the Add Form Elements button to add Drop-Down type
- Display Label: Give your drop-down a name that will appear in bold on the form, for example, Select Sponsor Level.
- This same name, by default, will also be the Reporting Label. This is the wording that will appear in your reports about this item. You can click the edit link to change the Reporting Label.
- Option Label: This is where you put the name of your Sponsor levels. For example, Gold / Silver / Bronze
- Option Value: This is where you put the amount that this sponsor level costs.
- Click Add new option to add as many sponsorship levels you desire.
- You can use the + / - buttons on the right to add an option at that place or remove an option you do not want.
- Click Save when you have added your different levels

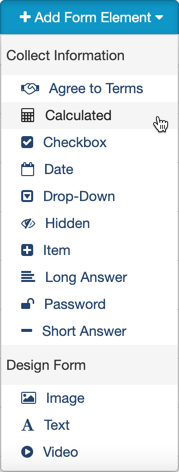
Make the Drop-Down become the total cost of the sponsorship
The next step is to have that number from the drop-down that you set up become the total amount on this form.
- Use the Add Form Elements button to add a Calculated type
- Reporting Label: Because there is no input required by the sponsor, you do not have a display label for the Calculated field. Name the Reporting Label something you will use when you run a report on this form.
- Show Results on Form / Show Results as an Amount: These are not needed as we will be setting this calculation as the total amount and that option overrides these, so they can be ignored.
- Make this calculation the final donation amount: Make sure to check this box. This will make the calculation you set up next as the total cost displayed on the form.
- This also overrides the Show Results on Form and Show Results as an Amount options as well as turns off the Suggested Amounts section completely.
- Use the drop-down below the grey box to select the Drop-Down Item you created above. It will appear as <drop-down reporting label> in the grey box.
- Because this all we need for the Sponsor level, click Save to complete the Calculated form element.

Add Sponsorship Level Descriptions
Create a new text box, image, video, etc. for each Sponsorship Level, by using the appropriate Form Elements under Add Form Element.
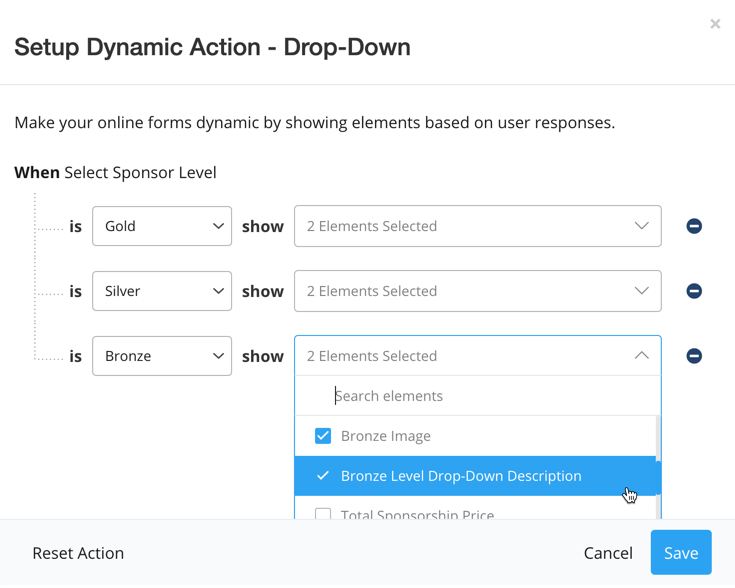
Add Dynamic Actions to the Sponsorship Level Drop-Down
While this is optional, it really makes the form come alive and gets your prospective sponsor engaged with the form. This will hide the information about the different levels of sponsorship when they are not selected, only showing that level's sponsorship information.
- Click the Dynamic Actions button next to your drop-down.

- Select the Level from the Drop-Down you created in the Select Value box next to the word "is."
- Where it says 0 Elements Selected, click and choose the items you wish to be displayed only when the Drop-Down value you selected in step 2 has been chosen.
- For example: When the Select Sponsor Level is Gold, by selecting the Gold image and the Gold description, it will only show those elements when Gold is the selected choice. If the Select Sponsor Level is Silver, those Gold items will be hidden on the form
- Click Add New Value and repeat for the next level from your Drop-Down.
- When you have assigned all your levels, the Add New Value option disappears.
- Click Save
- Test all your levels to make sure the Dynamic Actions are working correctly.
Your Sponsorship form is ready to go.