Certain images in GiveSmart Fundraise need to be a specific size to make the most of that image. For example, the Organization Logo that will appear at the top of any automated email correspondence with your supporters needs to be a maximum of 500 pixels so it formats to the email correctly.
Often, such as in Crowdfunding and Peer-to-Peer Fundraising or on the Event Page, we recommend a logo have a transparent background.
While you can use any image editor, for this article, we'll use the free resource, Pixlr.
You will need to create a free account and sign into Pixlr. As of this writing, Pixlr has two versions and we will use the "E" or advanced version.
Resizing an Image - Changing the Pixels
- Load the image.
- In most Image editing applications, look for the Image menu, and select Image Size (or in some programs it may be listed as Resize Image).
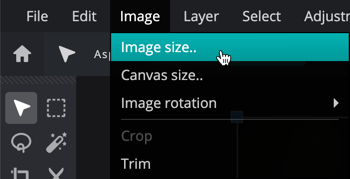
- In Pixlr, it only let's you adjust by pixels, so adjust the size to the needed, such as 500 pixels wide.
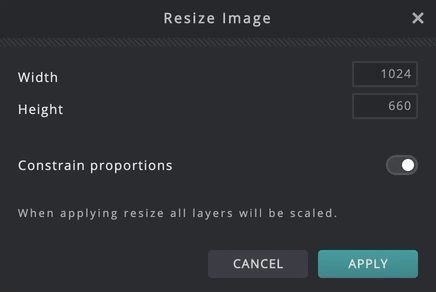
- Leave the Constrain proportions enabled so that the height will automatically adjust as you change the width.
- Other applications may start with either an image size listed as a percentage or inches. In these cases, there should be a drop down menu to select pixels instead. This is an example from Adobe Photoshop:
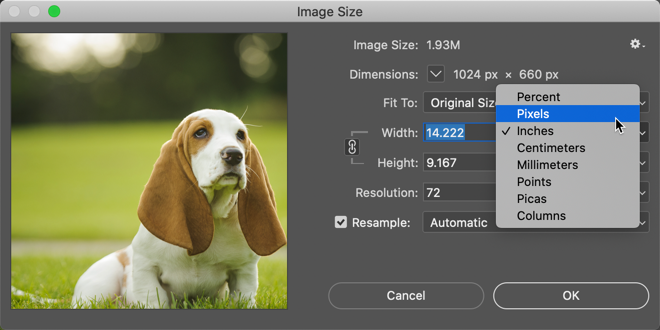
- These applications will also have a link or a lock between the Width and the Height that you will want to leave enabled so it will resize in both directions.
- Save your image
- We recommend renaming your image so you don't overwrite your original higher quality image
Resizing the Image - Smaller File Size
Sometimes an image may be too large and you will receive an error when you try to upload it.
There are several things you can do to fix this:
1. Resize the image pixels as described above.
2. Try a different file format
While there are advantages and disadvantages to the different formats, JPG or PNG, they are relatively minor on most webpages. You will want to test each to see which one looks best, but most of the time the type can be changed, and often you will end up with a much smaller size.
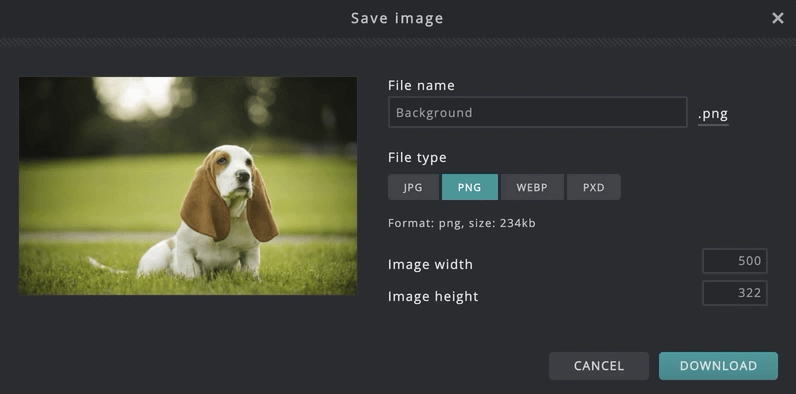
In Pixlr, when you Save the image you can choose the Image type by selecting a button. In other applications it is usually a drop down menu to change the image type. Most applications will provide an estimated file size.
3.Change the Compression / Quality
The JPG format allows you to adjust the compression of the image which reduces the file size but also the quality of the image. Usually you can reduce the size at least a little without serious reduction in quality.
In Pixler, when you save to the JPG format, this is listed as both quick buttons of Low, Med, or High and a slider that lets you be more granular by selecting a specific percentage.
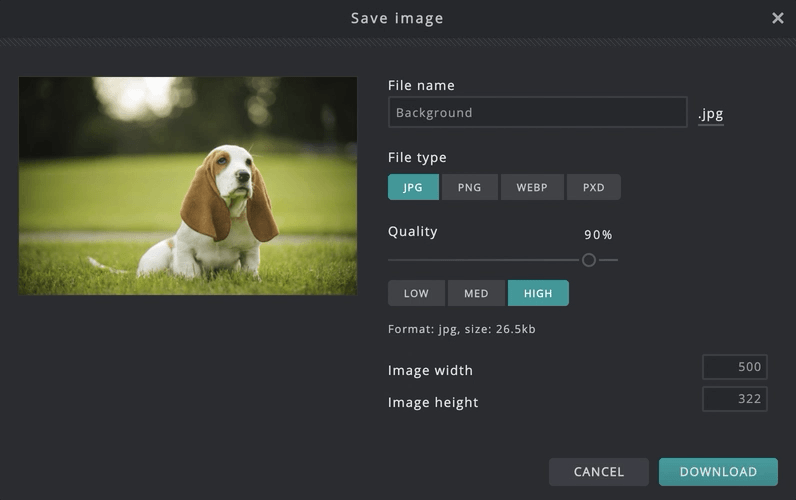
Depending on what is in the image, you can frequently drop the percentage to somewhere around 70% without a noticeable drop in quality for most webpages.
4. Crop the Image
The other options allow you to keep the ratio of the image as is. But you can also crop the image to remove unneeded parts. While this does reframe the image and change the framing of it, it does also resize it.
You can crop an image in any imaging application as well as in several locations within GiveSmart Fundraise.
Creating a Transparent Background
Often it is a useful to create an image with a transparent background so it looks like it blends into the webpage. With Pixlr and most image editing applications this is done with a combination of adding a transparent background layer to the image and then erasing what you do not need. Applications like Photoshop have more advanced techniques, too. There is also another free service known as RemoveBG that cam make the process very simple.
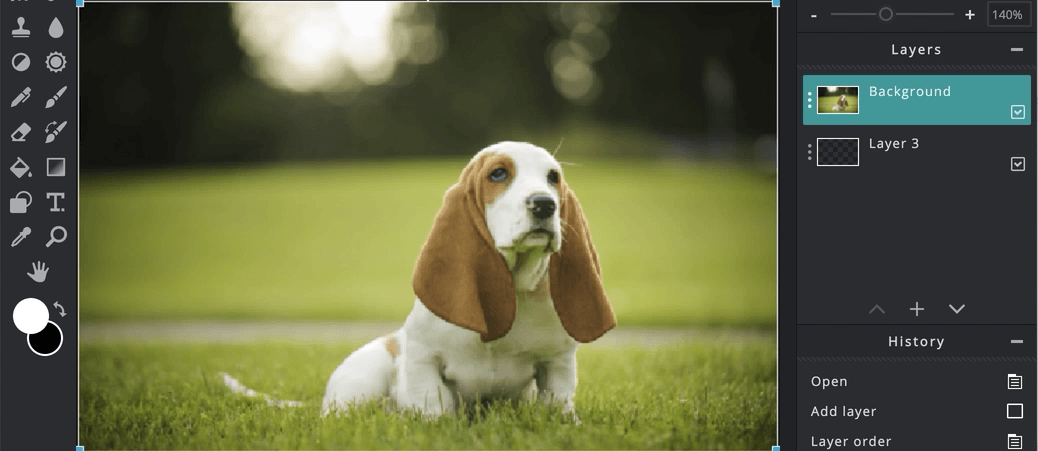
Image Editor Background Removal
- Add a layer
- You are often given a choice of what the background should be and you can select Empty or Transparent.
- Move the newly created layer to the bottom of the list.

- This can usually be done by dragging it and dropping where you need it.
- You may need to "unlock" your main image before it will let you make this new layer the bottommost later.
- Make sure you have selected your original image so you can edit it
- Find the eraser tool and start removing what you do not want.
- Save the Image
- Usually you have to uncheck or hide the background layer
- You can only save as PNG (or GIF). JPG does not support transparency in images.
Using RemoveBG
- Go to https://www.remove.bg/
- You can create an account, but it is not needed for images smaller than 640 x 400 pixels
- Drag and drop the Image you wish to remove the background from
- Download the new image
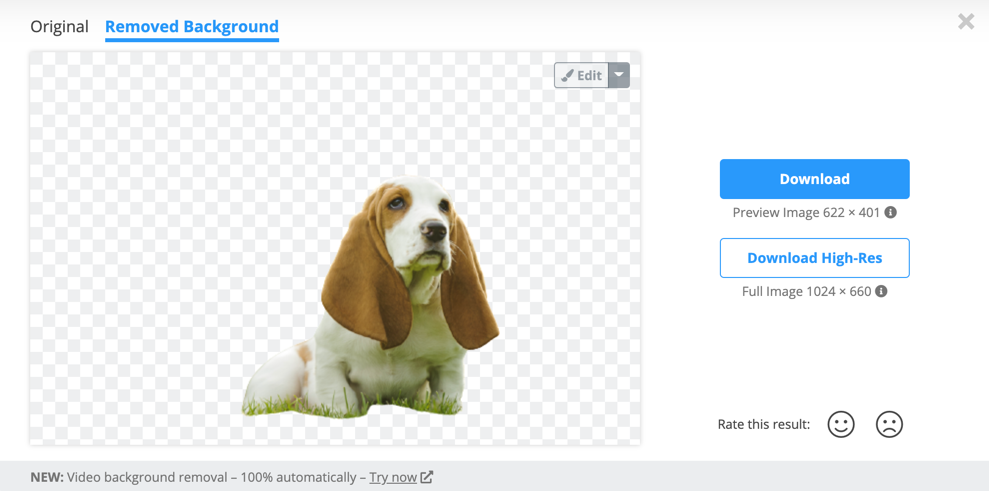
While RemoveBG is extremely simple since there are no real controls needed, it can be a great option with no real need to edit an image. But if you need a different type of background removal, like a blended/fade out or it is not recognizing the part of the image you want to keep, you may need to fall back to your imaging applications.