During the summer, nonprofits often host events like runs, bike rides, or dance-offs that encourage participants to fundraise. Paid Registration is sometimes required before fundraising begins. With Crowdfunding and Peer-to-Peer Fundraising, you can easily enable this by creating a form and linking it to a button.

Step 1: Create Your Activity
Create your Crowdfunding and Peer-to-Peer Fundraising activity and ensure your Fundraising Page, Donation form and Sign Up form are set up to your campaign needs. This is fully described in the How to Set Up a Crowdfunding and Peer to Peer Campaign article, here.
Step 2: Create a Registration Form
Now we need to create the paid registration form that we will have our participants use.
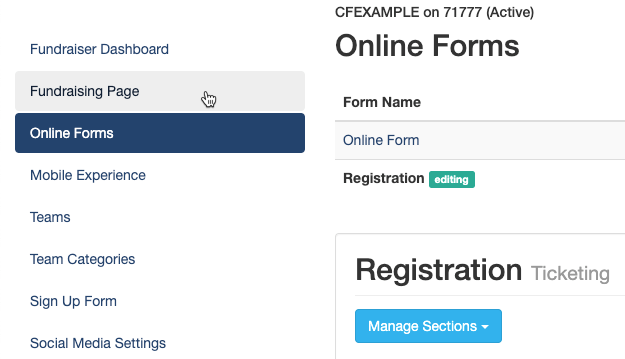
In your Crowdfunding and Peer-to-Peer Fundraising activity, click on the Online Forms category on the left.
You should see your Donation form and at the top, there is the option to create new forms. Click Create New Form.
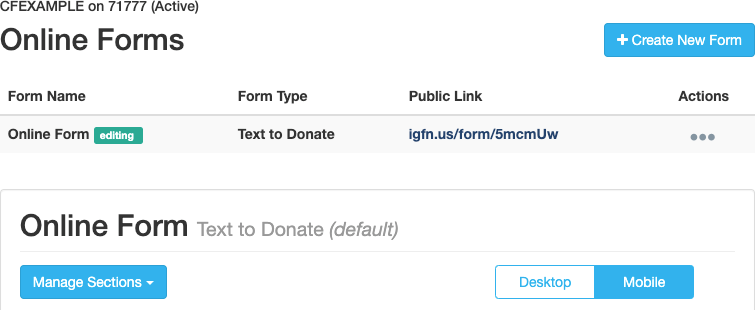
Name your Registration form and choose a type of form to use.
Depending on the functionality you want with your registrants, you will likely choose either a Ticketing form or a Registration form. We'll use the Ticketing form to take advantage of the extra features for this example.
Make sure to leave the Default as No since we still want our default online form to be our donation form. Click Save.

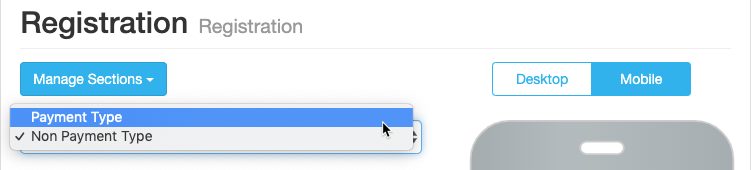
Registration: If you don't have a need to check in your registrants, you may find the Registration form more appropriate. When you choose a Registration form, you can then choose to make it a Payment or a Non-Payment form in the design of the form. Since this is normally used as an RSVP form, the default setting is a Non-Payment form.
For clarity, you may wish to rename your Donation form (labeled Online Form by default) so there's no confusion when you select forms. Go to the Action menu (the ... under Actions) and choose to edit the form and rename it.

Create your Registration form using the Ticketing Activity steps (described here). Feel free to make it as fancy or as simple as you desire, using different Form Elements and Dynamic Actions. Examples of things to include might be a line for birthdate, t-shirt size, acknowledgment of reading the waivers, etc.
With the Registration form ready, it's time to put it into your Fundraising page.
Step 3: Registration on the Fundraising Page
In this step, you will change your Fundraiser button to make it go to the Registration form.
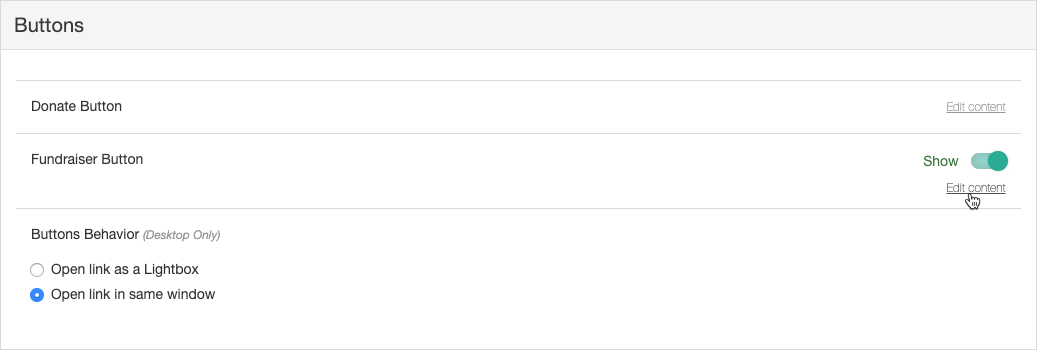
In your Crowdfunding and Peer-to-Peer Fundraising activity, go to your Fundraising Page category on the left.
Go into the Buttons section and click Edit content on the Fundraiser Button.
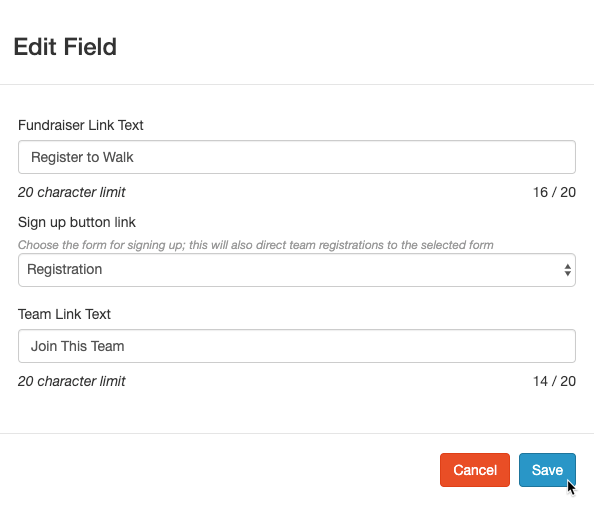
- Edit the Fundraiser Link Text to define the registration wording.
- Use the Dropdown to change the Sign up button link to point to your Registration form.
- Click Save.
That’s it! Your Crowdfunding and Peer-to-Peer Fundraising activity is now a dynamic, user-friendly Paid Registration page, and can still function as a donation page for traditional fundraising.
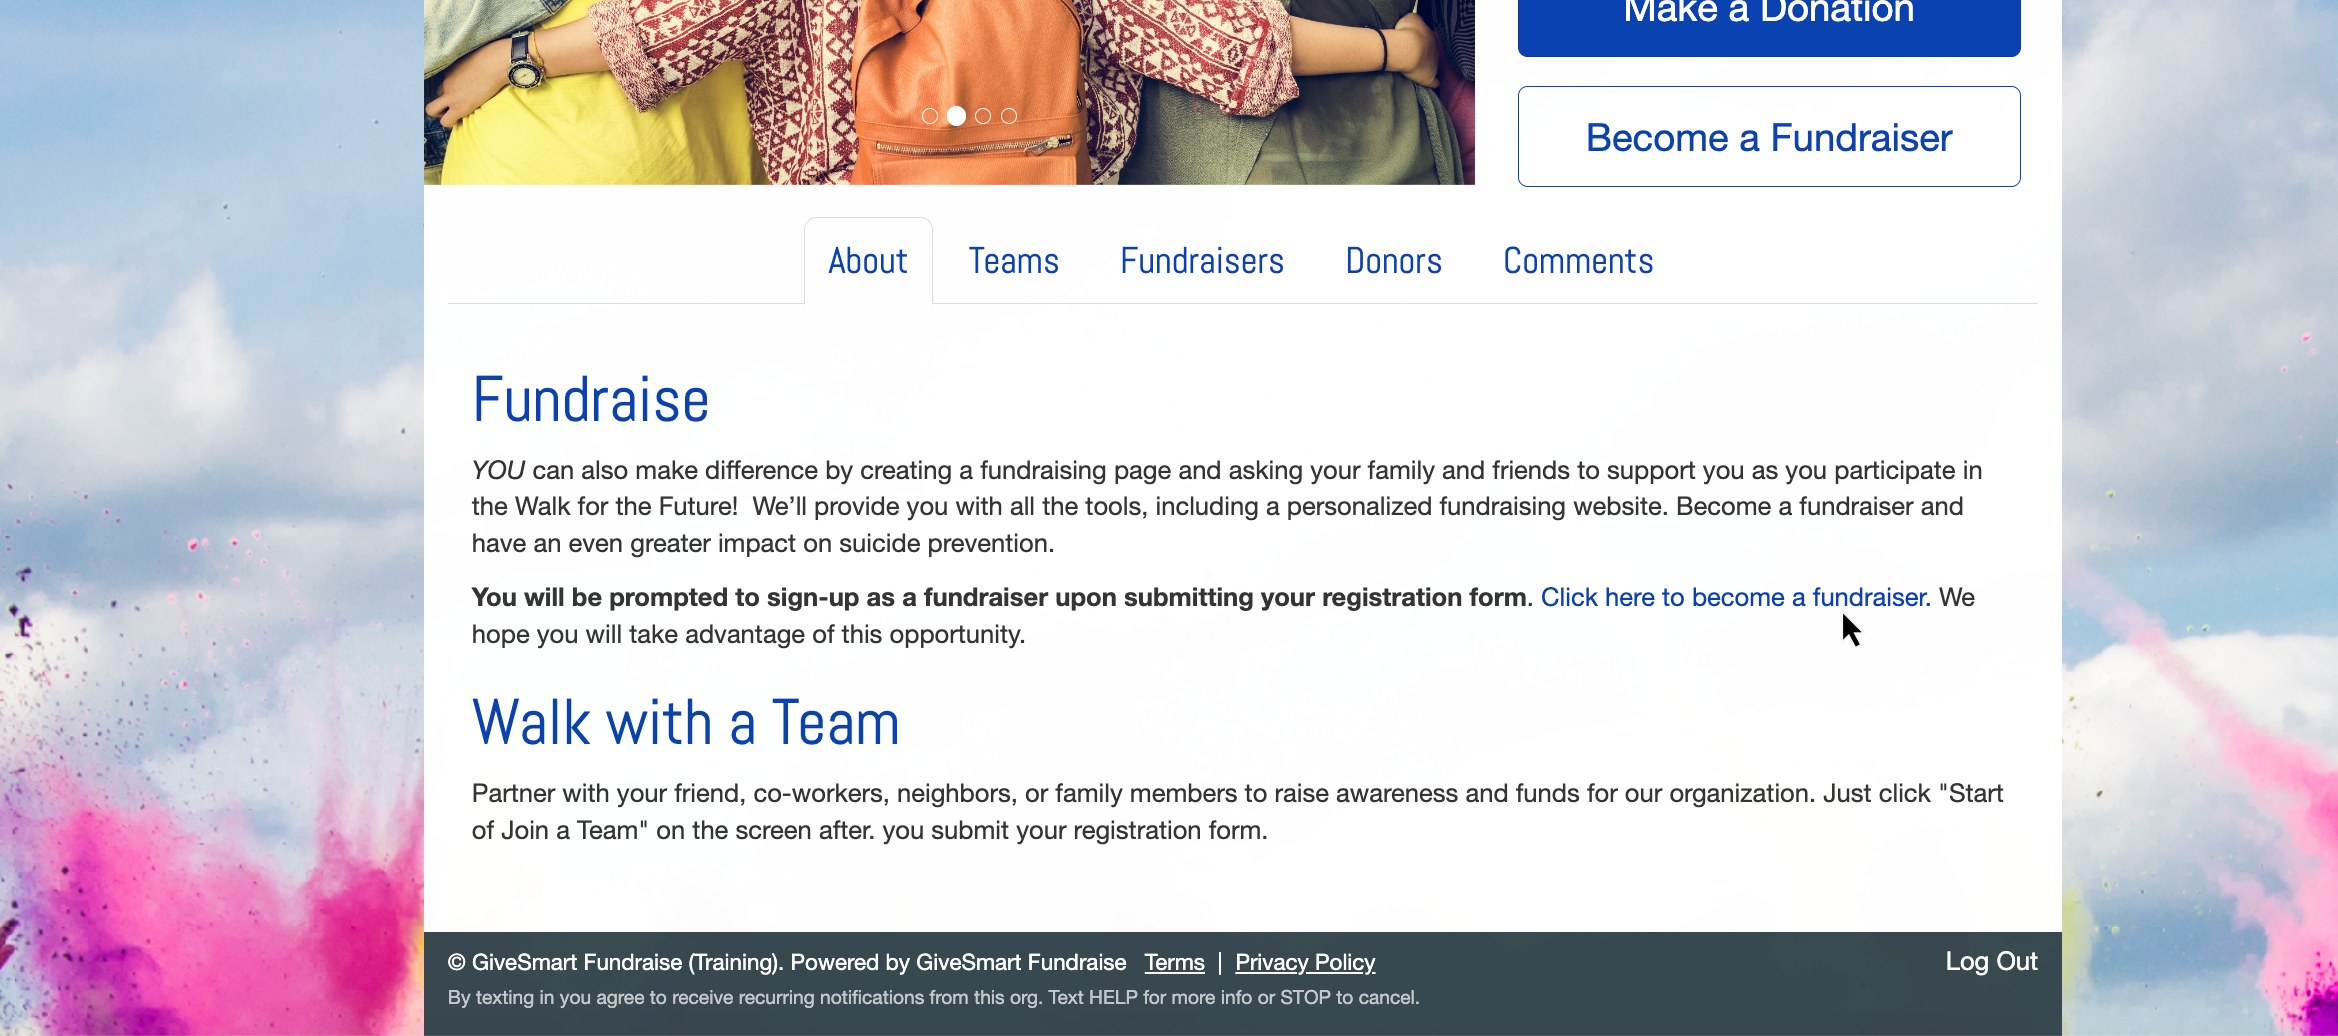
How does a Registrant Sign Up to Fundraise?
The steps above turn your Crowdfunding and Peer-to-Peer Fundraising activity into a registration page. But if you want registrants to take the next step and become fundraisers for your event, it’s easy.
Just return to the Online Forms section, and click the title of your registration form. This works with any payment form.
Open the Form Submit section > enable Option to sign up as fundraiser.

Enabling the Option to sign up as fundraiser reveals the option for individuals/registrants to sign up as a Peer Fundraiser directly from your registration form.

If a registrant selects I'd like to sign up!, they will be directed to personalize their page upon submitting their gift.

They can also select Apply funds to myself to have their purchase reflected on their personal fundraising page, and contribute towards their individual goal.
Advanced Concepts
Virtual Registrants / Participants / Fundraisers
Maybe you have supporters who want to help, but the timing is wrong or the idea of going on a Run doesn't thrill them. Then provide "Virtual Registrations" using the Item Element on your Ticketing Form.
The Item Element is the same style and design as a Ticket Element. So, if you have an extra "ticket" choice for your Registrations for the non-participants, you can use the Item Element so they won't receive the email with a ticket where they'd check-in for the event. On the form, it will look like any other ticket, but in your design, you can see that it is an Item instead.

Formatting your Impact Tab
Sometimes you want to give your supporters the option to fundraise without becoming a participant. Maybe you want to include an option for Sponsorships. While your Crowdfunding and Peer-to-Peer Fundraising buttons are going to be your supporters' links to the most used or important forms, that doesn't mean you can't have more options. Use your impact tab to the fullest.
To get to you Impact tab, in your Crowdfunding and Peer-to-Peer Fundraising activity, select the Fundraising Page category on the left, then open the Tabs section. The first Tab is your Impact tab. Click on Main Text to start writing.

Use the Rich Text Editor in the Main Text to design anything you like: Add Images, Video, Links and more. If you have a web designer, they can even edit the HTML directly.
Create as many forms for different purposes, so you can specifically target that audience, and then just use the link from those forms as you describe your event in the Impact tab.