Collecting a Date may be a need, such as for a range for a run/walk, attending an age-restricted venue, a survey for requested dates of action, or any other reason. The Date element provides a simple way to collect that information.

Date is one of the simpler Form Elements, in that the only thing to decide is the Display Label and the Reporting Label.
To add a Date element, you may want to add it to its own Section, as outlined here.
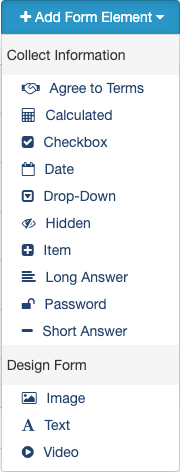
You may also want to add descriptive text, an image, or a video about it.
When you're ready to add the date element, select it from the Add Form Element button in (any of) the Sections.
You will be presented with the Add Form Element - Date design page.
Display Label
The Display Label is the description of the Date element on the form, for your supporters to see. This could be a single word or a full description of why they should enter the date.

Reporting Label
The Display Label may be a longer description, therefore it might be a good idea to have a separate and simpler Reporting Label.
- After the initial save of the element, you can reopen the element and click edit in the Reporting Label line. It will open with the Display Label's text as the default for the Reporting Label.
- You can use the text or change it as desired.
Click Save to complete adding your Date element.
Using the Date element
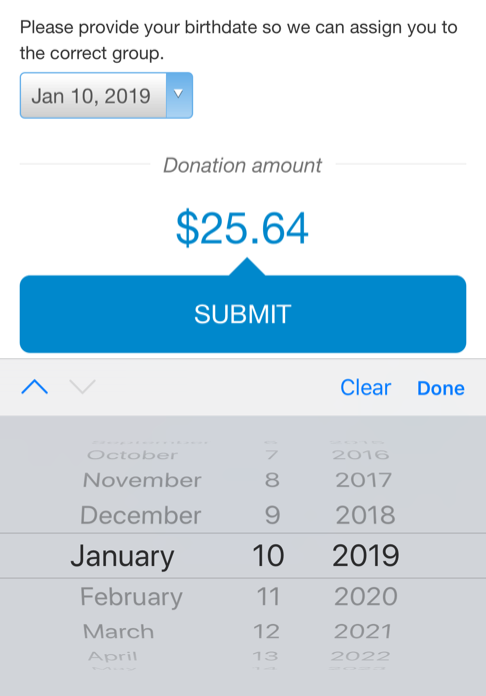
The Date element on the form allows the supporter to enter the date in many ways:
- Typing: When you click into the date field you can just start typing the date desired. You can also select the month, day, or year field to directly type or correct that item.

- Arrow Keys: You can use your arrow keys to scroll through the date selection or click on the up/down arrows to the right.

- Calendar: Click the Arrow to the right to open a calendar to choose a specific date.

- Mobile Device Date Entry: Your mobile device should recognize this as a Date entry element and use its methods to let you select a date.