Logging In To Your Account
Go to https://www.givesmart.com and click login (top right). You can also login by going directly to fundraise.givesmart.com.
User Email: XXX@XXXX.XXX
Password: changeme
Dashboard Overview
When you log into your account, you’ll see your account at a glance:
- The first box shows total donations
- The second shows subscriptions including how many messages you have sent this month as well as the number of mobile subscribers that you have
Underneath, you will see your campaigns in the form of tiles. If you are new to GiveSmart Fundraise, you may only have a New Campaign tile to start creating your campaigns.
Changing Your Password
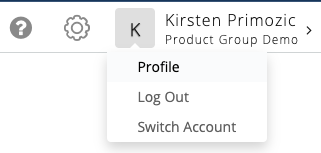
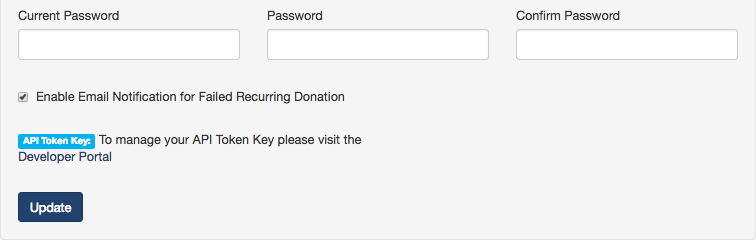
Click on your name in the top right of your dashboard and click Profile.
Enter your current password and a new one twice.
Adding Users to Your Account
Click Settings (the Gear icon) in the upper right hand corner of your dashboard.

Then click + Add User.
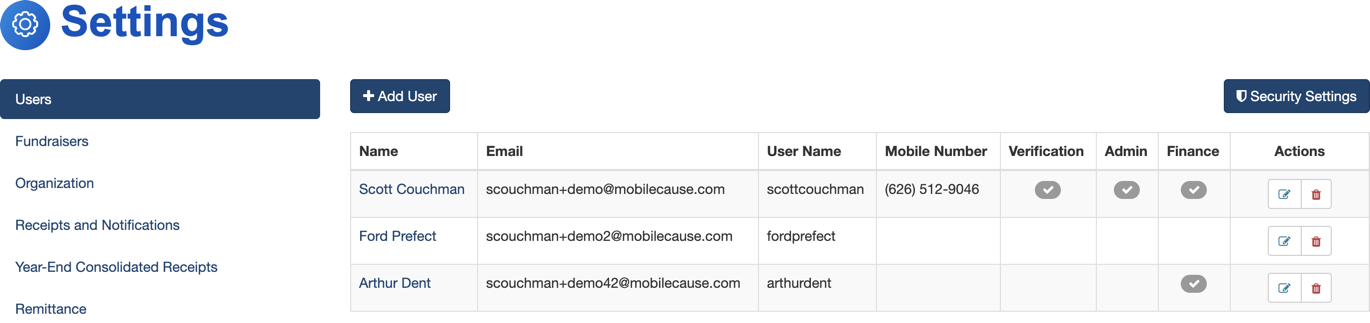
There are two permission levels for Users:
- Admin Users can make changes to the User Administration section or make changes in the Settings in your GiveSmart Fundraise Account.
- For GiveSmart customers who own 2 or more GiveSmart modules, you have the option to create admin who can utilize our Single Sign-On feature allowing your admin to have 1 username and password for all GiveSmart modules.
- Non-admin Users can make changes to your online forms and export reports.
If someone needs the ability to create more users, be sure to make them an Admin.
Verifying Remittance Information on Your Account
Click Settings in the top right of your Dashboard. Click on Remittance on the left hand menu. Confirm that the correct address is listed.

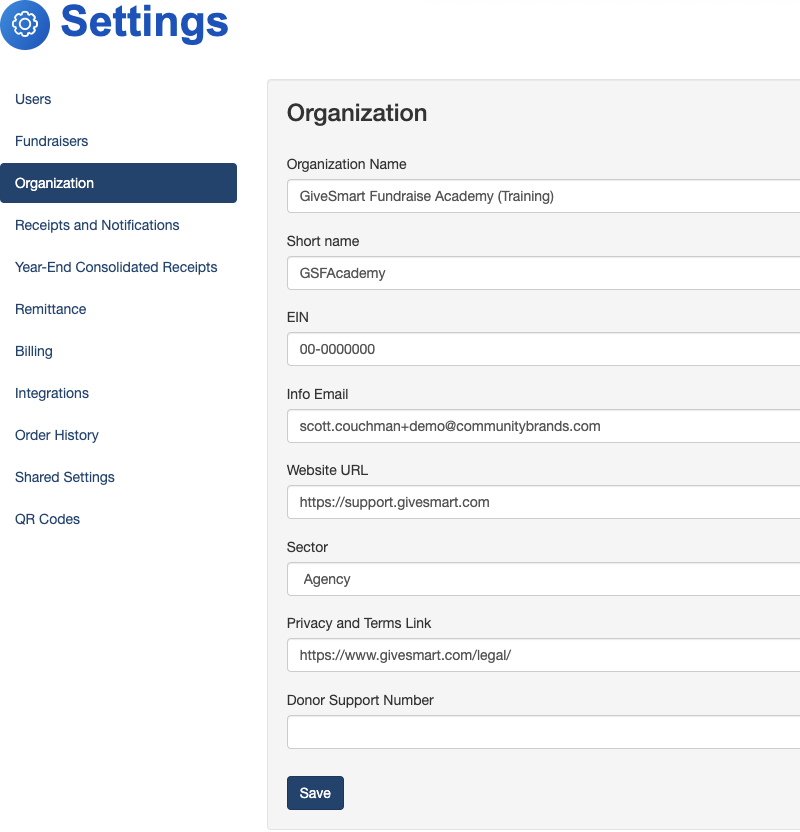
Choosing Your Organization Short Name
Click Settings, then Organization. Create a recognizable Short Name that your donors will recognize that fits within the 15-character limit. Your Organization Short Name will appear in text messages to your donors and as a hashtag if they tweet about you after they donate.
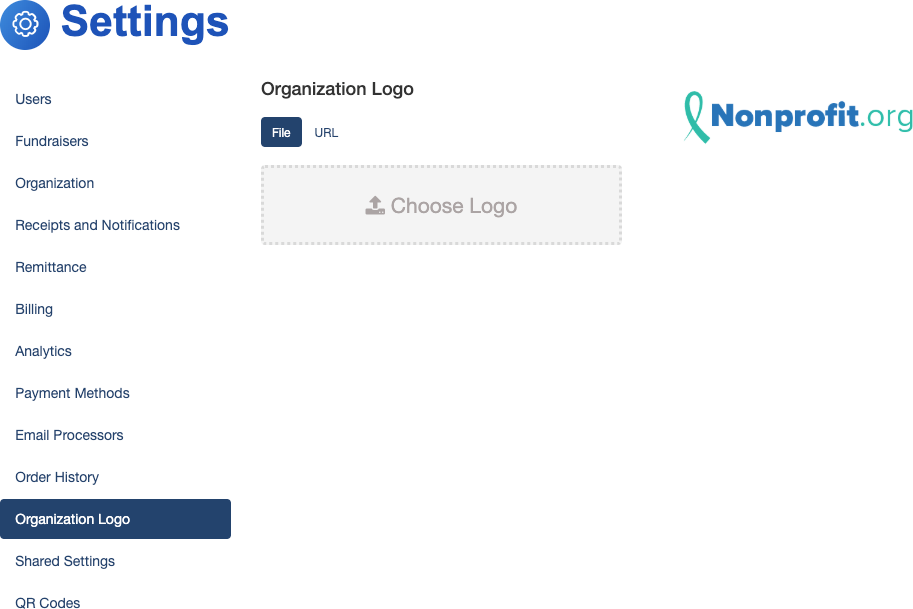
Organization Logo
Click on Organization Logo on the left hand menu. Click File to upload an image from your computer or URL to upload an image using a link to that image. Select the image you wish to upload by clicking Choose Logo. Upload a .JPG or .PNG file that has an aspect ratio of 80:27 (for example, 400 x 135 pixels or 800 x 270 pixels)
This logo will show on tax receipts that are emailed to your donor after they complete a donation and on the Thank You page after your donor completes their donation.
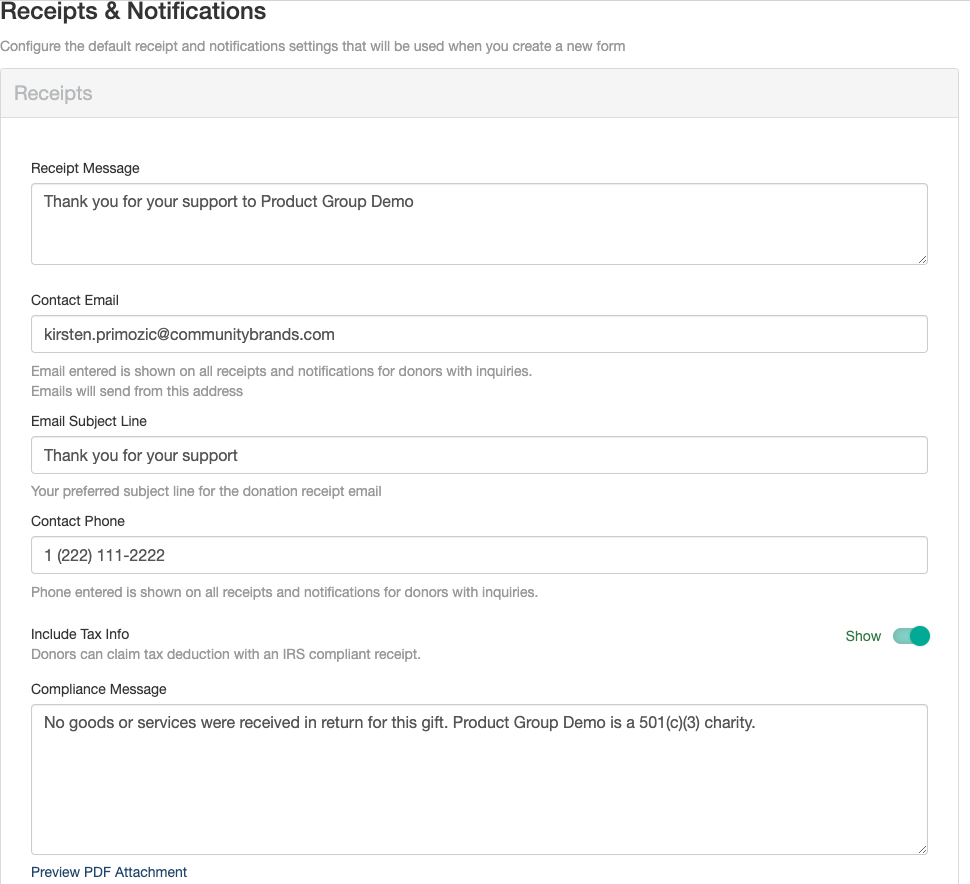
Configuring Your Tax Receipt
Click on Receipt Configuration from the left hand menu to customize the Thank You Message on your email tax receipts. You can also customize the sender email by adding a contact email.
Setting Up Your Merchant Account:
- Complete all fields on the application form.
- Send an image of a voided check or a bank letter to merchantaccounts@mobilecause.com (this will be uploaded to the merchant account provider along with the completed form).
- Complete the digital signature form (this will be sent to the email address listed as the contact on the application form).
The review process will take 2-3 business days from the time of submission. As soon as the application is approved, the merchant account will be activated and linked with your GiveSmart Fundraise account.
You will receive an automated email with your merchant ID and a link to create a login for the merchant center portal.
4. Confirm your account by clicking the link, creating your user login, and logging in to the merchant center.