This article describes the specific settings to set up the sponsorship portion of a Corporate Sponsorship activity. You will need to prepare the rest of the form using the Corporate Sponsorship Activity Design article which includes key items to add to every Corporate Sponsorship form.
This design of a Corporate Sponsorship form used the Item type of Form Element. This method is the best looking and easiest of the methods of creating a Corporate Sponsorship. If you are familiar with creating Ticketing activities, this will be very similar.
Note: If you are providing actual tickets for your sponsors, you may wish to create a Sponsorship activity using a Ticketing activity and reword the ticketing activity to represent Sponsorships.

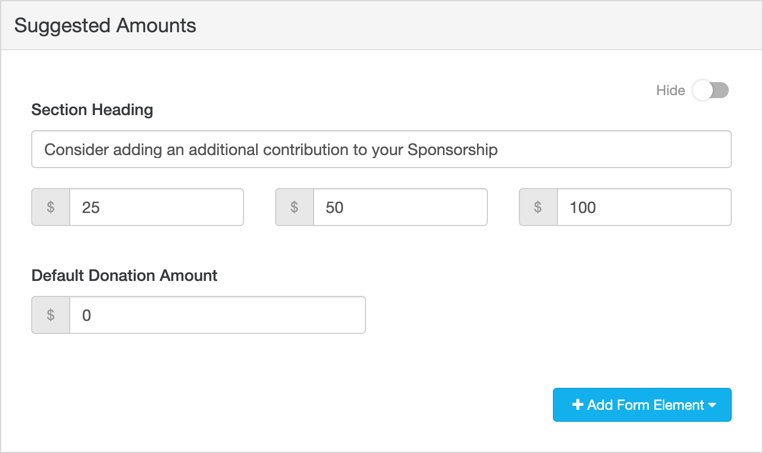
Set Up the Suggested Donations section
- Per the Corporate Sponsorship Activity Design, you should already have the Donation buttons hidden. If not, hide them now.
- Change the Section Heading to something to suggest an additional contribution to the Sponsorship level.
- If you wish to be more verbose, consider removing the Heading, then add a new section and a Text element to describe the option more fully, but remember this is just an additional contribution, not the main sponsorship, so it should not be as prominent.
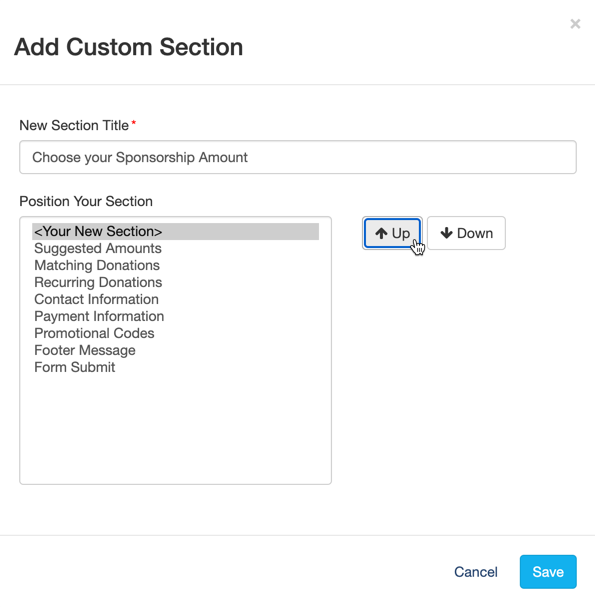
Add a New Section Above Suggested Amounts
- Click Manage Sections in the upper left
- Click Add Custom Section

- Name your section, for example, "Choose your Sponsorship Amount"
- Use the Up/Down Arrows on the right to place it at the top of the sections, specifically above the Suggested Donations.
Add Description
- Open the newly created (empty) section
- Create a title to be displayed on the form in the Section Heading area
- This will not appear on the form until at least one element is added to the section.
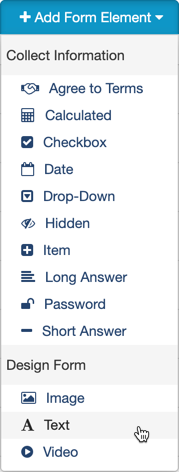
- If desired, use the Add Form Elements button to add Text and/or Images to describe what to do and the levels of sponsorship you offer, what will happen next or anything else you may want to add.
 Note: It is generally recommended to have an actionable item visible on the page so try to have at least one of your sponsorship levels visible on the form when it is first opened.Add an Item Form
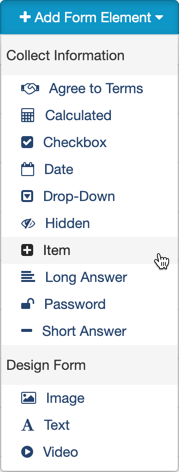
Add an Item Form Element for your Sponsorship Levels

- Use the Add Form Elements button to add your first Sponsorship Level by selecting the Item type
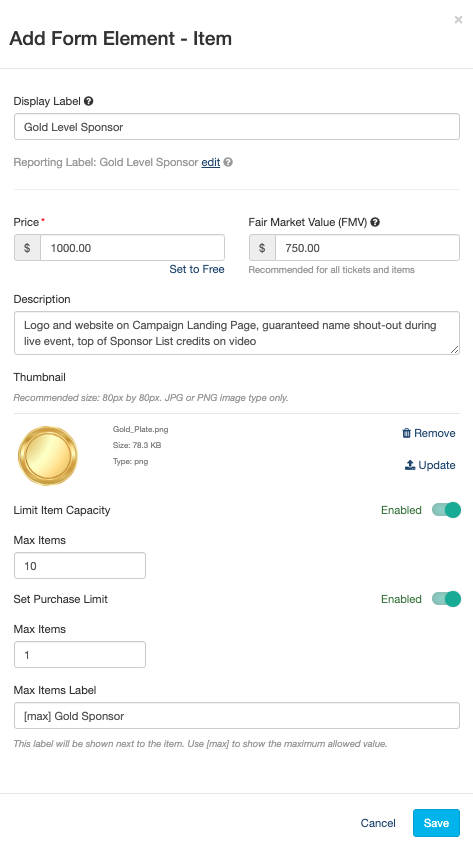
- Display Label: Give your Item a name that will appear in bold on the form, for example, Gold Level Sponsor
- This same name, by default, will also be the Reporting Label. This is the wording that will appear in your reports about this item. You can click the edit link to change the Reporting Label.
- Price: Set the price of this Sponsorship Level.
- Fair Market Value (FMV): Set the fair market value of each Sponsorship Level. The Fair Market Value is the amount that someone would pay for the benefits of each Sponsorship Level in a fair market (i.e., outside of the context of supporting your organization). The difference between a Sponsorship Level's price and FMV is the Tax-Deductible Amount. All three values are displayed on the receipt, but only the price is displayed on the Sponsorship Form. Setting a Fair Market Value is optional but recommended.
- Description: Provide the details of what this level of Sponsorship offers.
- Note: The Description can only add 140 characters. If you wish to be more descriptive of the offerings of this level, you will likely want to add a Text form Element immediately below the Item Form Element where you can more fully describe the features of this Sponsor Level
- The description is straight text. Separated lines or special formatting will not appear in the description.
- Thumbnail: Provide an image to represent the level of Sponsorship.
- Limit Item Capacity (+ Max Items): If you wish to make this Sponsorship Level more exclusive, you can set the maximum number of sponsorships of this level. It will show on the form how many are left and once that number has been reached, no more of this level will be offered.
- Example: This level of sponsorship may include verbal and visual recognitions during a live event. Only a certain amount will fit in your program, so you can limit the number of this level.
- This does install a sense of exclusivity, to make sponsors consider this option more seriously.
- Set Purchase Limit (+ Max Items): Turn this on and set it to 1. Your Sponsors will only buy one sponsorship.
- Max Items Label: This defaults to saying "(Purchase Limit Max Items) Item Limit" on the form. You can change this to whatever works for you, such as "1 Gold Sponsor"
- Click Save when you have finished
- Now repeat these steps for your other levels.
Your Sponsorship form is ready to go.