Learn how to setup your Facebook donation page and drive social donations via smartphones, tablets and PCs.

Note: Facebook restricts smartphone and tablet users from clicking in-app donation page URLs. Be sure to complete all the Parts below to ensure followers can give on any device.
Facebook is changing how they define page permissions for pages with less than 2,000 fans due to some folks using facebook tabs for spamming purposes. This is making it so pages with less than 2,000 fans are unable to add 3rd party apps.
We are working on a solution we hope provides the extra layer of security Facebook requires to prevent a tab from being used to spam and thus allow you to add and use tabs like normal.
How to Create a Donation Page on Facebook:
Part 1: Install iframe tabs to your Facebook page
Part 2: Create / Edit your Donate Tab
Part 3: Move the Donate Tab to the top of the list on your Facebook Page
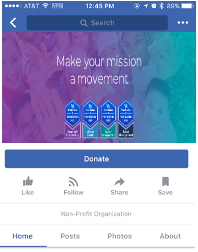
Part 4: Change the Donate/Call To Action Button to go to the Donation page
Prerequisites:
- Perform these steps from a computer, you cannot do this set up from a smartphone or tablet.
- Ensure that you are an Admin on your organization's Facebook page.
- Ensure that you are logged into your Facebook account.
Install iframe tabs to your Facebook page
Note: You cannot complete this step from a smartphone or tablet.
Step 1:
From a computer, search for “Static HTML: iframe tabs” in the top search bar.

Step 2:
Scroll down to the Apps section and click Use Now on the “Static HTML: iframes tabs" item.

Step 3:
Click the “Add Static HTML to a Page” button

Step 4:
- Click the“Facebook Pages” button with drop down menu.
- Select the organization page that you would like to install a donation page on.
- Click “Add Page Tab” button.

Note: if you get an error, your Page may not be verified yet. Follow the instructions to verify the Page. Then click Back and add the Page Tab again.
Create / Edit your Donate Tab
Step 1:
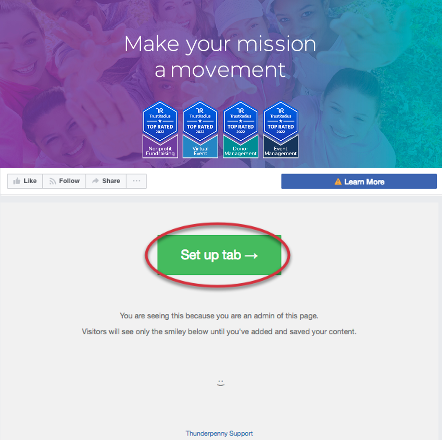
You will be redirected to your organization's Facebook page with the new “Welcome” tab selected. Click the green “Set up tab” button.

Step 2:
Copy and paste the iFrame embed code for the donation form you would like to add to your Facebook page.

Step 3:
- Click the Actions Menu
- Choose “Edit name & image”

- Type “Donate” as the Tab Name.


Step 4:
- Click “Save tab name”
- Click “Save & Publish”

Move the Donate Tab to the top of the list on your Facebook Page
Step 1:
Go back to your organizations Facebook Page and click Settings

Step 2:
Select Edit Page

Step 3:
Drag the “Donate” tab into position

Change the Donate/Call To Action Button to go to the Donation page
Step 1:
Click on the Add a Button button on your Facebook Page
Note: This may currently be listed as something else, so you can edit what is there instead of creating a new one.

Step 2:
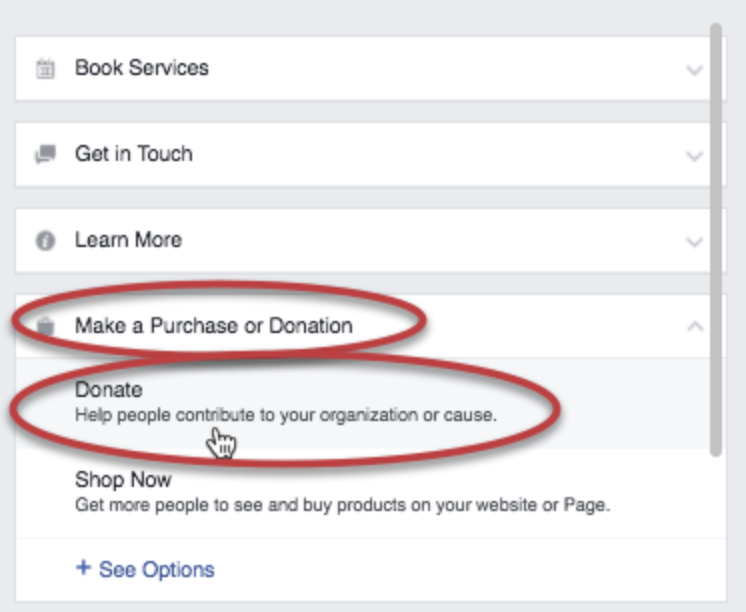
Click the Make a Purchase or Donation option, then choose Donate.

Step 3:
Add the shareable website link from your GiveSmart Fundraise form
Click Add Button

Your donation page and button are now live on your Facebook!

Recommendations for Donation Form on Facebook:
- Organization logo
- Background image
- Suggested amounts
- Recurring gift options
- Important donor data fields
- Simple payment fields
- Custom submit button
Tip #1
Make it as easy for your followers to give by keeping your donation form as simple as possible. Capture important donor data for future engagement.
Tip #2
Embed a unique donation form so that you can easily measure how many donations are made on Facebook.
Recommendations for Donation Page Link Sharing on Facebook:
Nonprofit organizations should encourage volunteers, donors and staff to share a unique donation form shortlink which goes directly to your mobile-friendly donation page. This ensures that all your followers will be able to give from any device.