A survey can help give your supporters a voice; give them an easy, low commitment way to interact with you. Surveys can be used to find out what your supporters thought of an event or what they would like to see from you and more.
As your supporters fill out your survey, you collect their contact information to nurture and cultivate them into a more lifelong supporter.
The basic design is very simple. It can be considered to be based on the Text-to-Donate activity, but this non-payment form is even simpler because none of the payment features are part of the activity. From the basic design, you can any number and style of question based on the different added Form Elements.

Create a Survey
To create a Survey, you need to have a Campaign already created. If you do not have a Campaign or want to add this activity to a new one, click on New Campaign to create one and follow the process of creating a campaign, as outlined here.
Then create a new activity from the New Activity button on the dashboard on the right or hover your mouse over the Campaign Tile and click on the Plus icon.
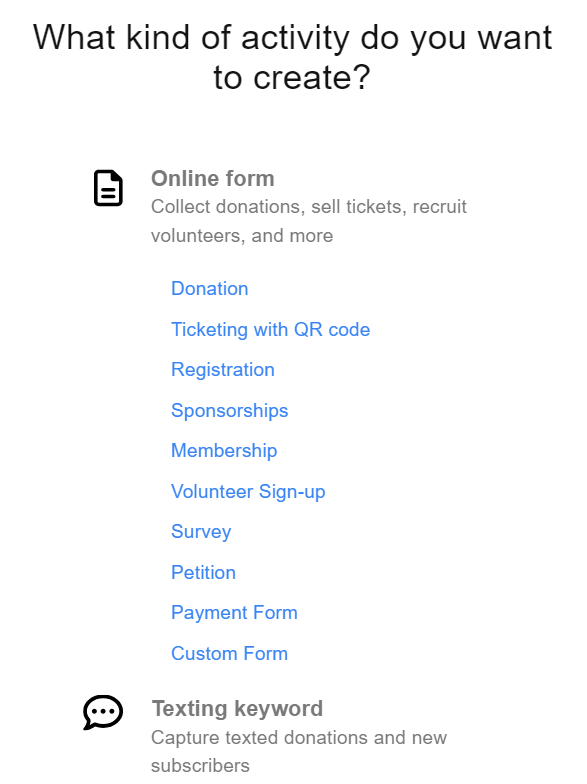
In the pop-up, open the Online Form section and select Survey.
Set Up Your Keyword

- Either type in a new Keyword, or select an existing one to reset and start from scratch.
- Select a Campaign.
- If you create your activity from the Campaign Tile or within the campaign, it automatically selects the campaign for you.
- Choose what Shortcode you would like to use: 41444 or 91999.
- The shortcode of your keyword is the phone number that the donor will text your keyword to. We give you two options to choose from. Since all GiveSmart Fundraise customers share the same two shortcodes, keyword possibilities can be limited. This allows there to be two of the same keyword to exist, just on separate shortcodes.
- Click Save to create your activity and start personalizing it.
Detailed Set Up Your Keyword Info
Initial Survey Set Up / Preparation
The Online Form is where you design the survey. This is where you will select what information you collect and how the general experience will feel. As you edit the form, you will see a mobile preview of the changes you make to the right of the editable sections. You can also preview the desktop and tablet views as well.
The Survey only has a few initial sections to design to collect the basic information from your supporters.
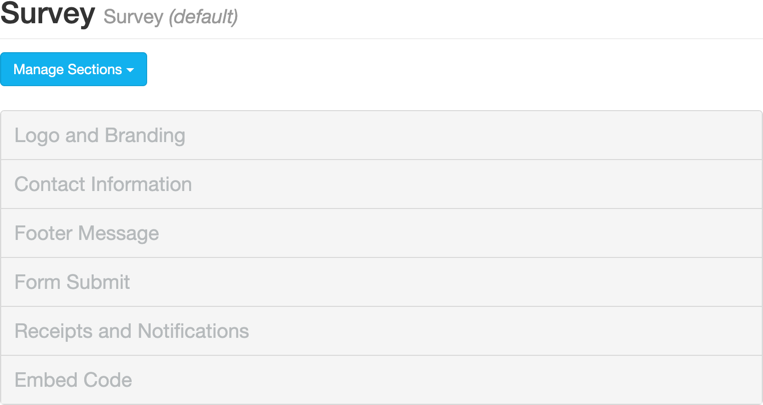
Logo and Branding
Change the look of your form with a logo specific to this activity. You can add a background image or color and move the placement of the form on the webpage. You can change the overall color scheme of the form by changing the Button Color by entering a hexadecimal color code, or clicking the color square to use the circle and square to set the color.
Detailed Logo and Branding Info
Contact Information
Collect the information about your supporters, such as their name, mobile number, email address, and physical address. We highly recommend that you select one or more methods of communication as a required item so you have at least one way to reach out to them later.
Detailed Contact Information Info
Footer Message
The Footer Message Section is a text box to add any last item before the donor submits their donation. It is not often used, which is why it is hidden by default. Remember to switch it to Show if you are using the Footer Message section.
Form Submit
The Form Submit section is the last section to personalize on your form that is visible on the form itself. The main function of the Form Submit section is to show the total donation and the SUBMIT button. Change the wording of the button to make it more personal.
Receipts and Notifications
The Receipts and Notifications section of your form configuration allows you to control the automated communication with your constituents. You can choose to use both texting (SMS) and/or Email. Both forms of notification are enabled by default.
Detailed Receipts and Notifications Info
Embed Code
Use the code in the Embed Code section to embed the form on a secure webpage on your site.
Personalize Your Confirmation Page
The Confirmation Page thanks your supporters for their answers and provides different calls to action for them. There are only two sections on the Confirmation Page:
- Content
- This is where you can thank your sponsors by name, let them know their answers have been saved, and provide text, images and/or videos to further thank them.
- Actions
- Here, you can add buttons to direct your sponsors to other pages, such as a site to upload a logo or include calendar link for them, etc.
Detailed Confirmation Page Info
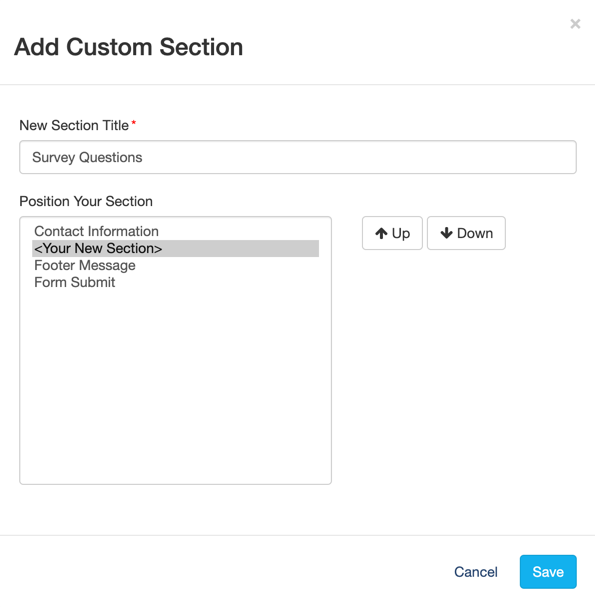
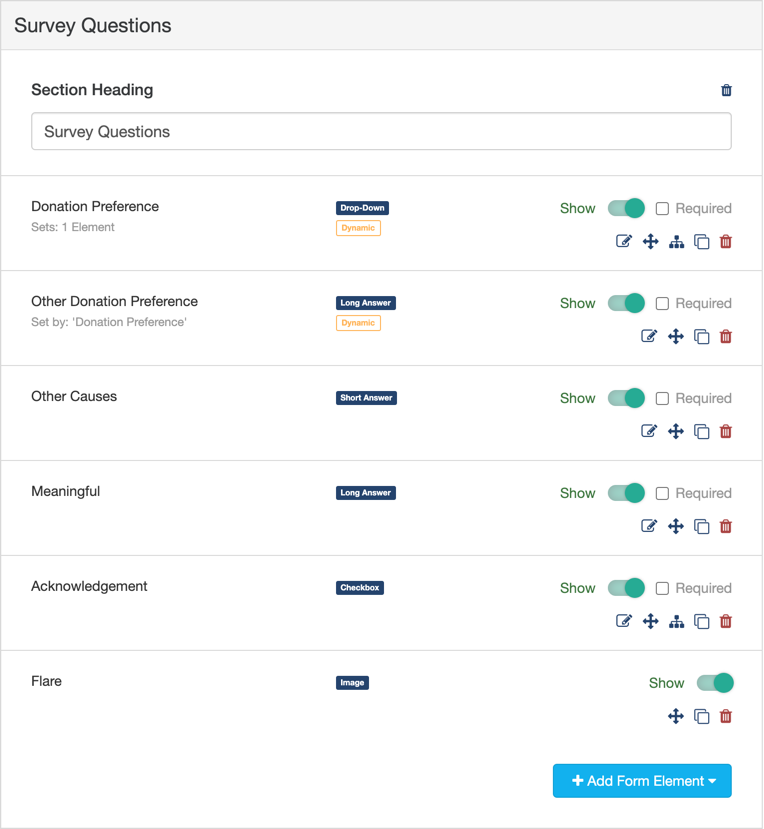
Add Survey Question Section
To keep the Survey clean and easy to read and edit, you will likely want to add one or more Survey Question Sections,
- Click Manage Sections in the upper left
- Click Add Custom Section

- Name your section, for example, "Survey Questions" or "Questions Part 1"
- Use the Up/Down Arrows on the right to place it where you want it.
- Some believe asking the questions before collecting the contact information is better, others believe collecting the contact information first so the "easy" questions are out of the way (and you're more likely to collect more contact details) is better. Both methods have merit.
- Click Save
- There is no limit to the number of sections you can add, so if you have questions grouped by topic, it may be beneficial to have each group in its own section to easily adjust the flow of the questions by moving the sections.
Detailed Add or Manage Sections Info
Add Survey Questions
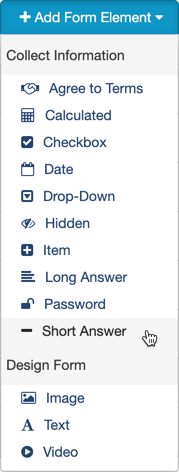
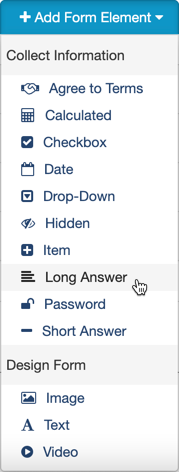
Creating Survey questions can be accomplished with the Add Form Element button in the lower right of the section.
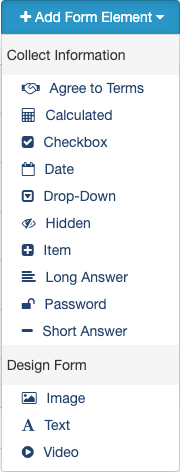
While you can create questions using almost any of the Form Elements, the most common types of questions will be:
- Drop-Down: This will provide a limited choice for your supporters
- Long Answer: This provides an open answer with a maximum of 255 characters
- Short Answer: This provides an open answer, but has a maximum of 100 characters. Short Answers can also be set to numbers only, so they will not accept letters if desired.
Detailed Add Form Element Info
Survey Question Examples
Surveys can be used to collect just about any kind of information you would like from your supporters: New Supporter details, First Donation, Suggestions for Event Activities, How are we doing, etc. This section will take you through a few examples of question ideas and how to to design them.
Limited Choices (Drop-Down)
"On a scale of 1-5, how would you rate our Spring Gala?"
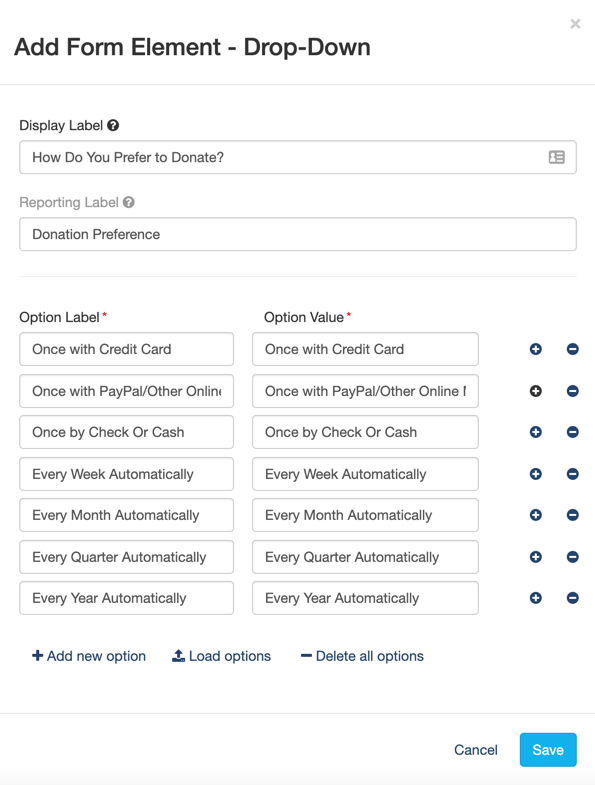
"How do you prefer to donate?"
"Which of our initiatives appeal to you the most?"
Providing limited choices provides easy to answer questions for your supporters and easy to analyze results for you. You can accomplish this with a drop-down element.
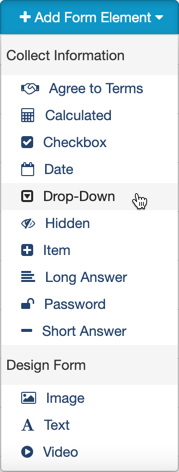
- Select the Drop-Down element from the Add Form Element menu
- Use the Display Label to ask your question. It has a maximum of 255 characters.
- You may want to edit the Reporting Label. By Default, the Reporting Label will be copied from the Display Label, but that may be longer than you desire when you run a report. Click the edit link and make your Reporting Label more succinct.
- Add choices by typing in an answer on the Option Label
- By default, the Option Value will be copied from the Label. The Option Value is what will appear in the report, so you can adjust the value for a better report as desired.
- Click Add New Option to provide a new choice at the bottom of the list
- You can click the + button to the right of a choice to add a new choice in that location
- You can click the - button to the right of a choice to remove that choice
- You can rearrange the choices by clicking and dragging a choice to another position
- Click Save to complete your question
Add an Other option with a hidden entry
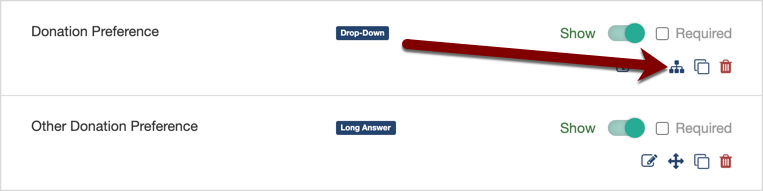
Drop-Down Form Elements can control Dynamic Actions. If you have choices, but want to provide an open-ended option, such as an "Other" choice, you can include something like a Long Answer so your supporters can enter what they want.
- Once you have a Long Answer added (see the Long Answer Question below for its design), click on the Dynamic Action icon by the Drop-Down in your list.
- Select your Other choice for the Select Value next to the word is.
- Click the 0 Elements Selected and scroll down to find and check the Long Answer Element you created to work with this Other choice.
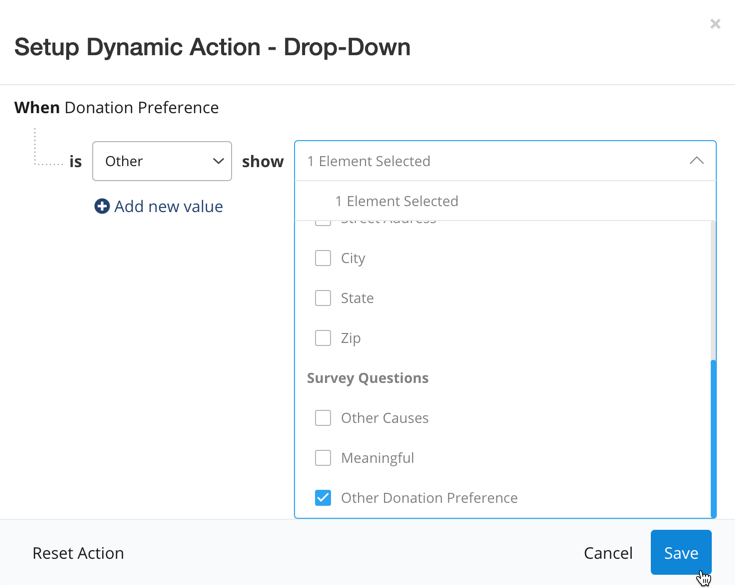
- Click Save.
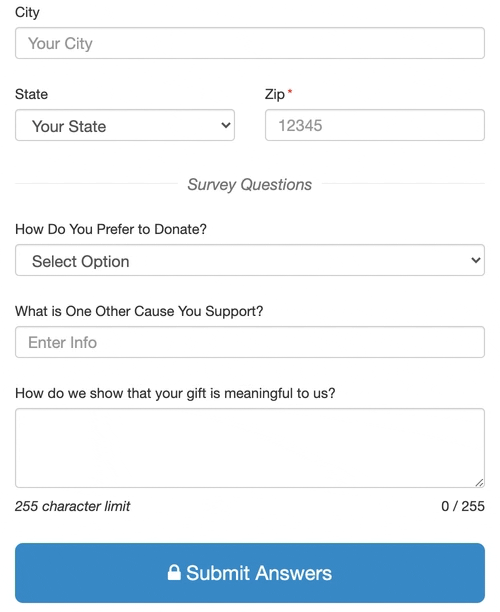
Now the box to answer that other choice will be hidden unless the Other option on the Drop-Down has been selected:
Asking Questions with a Short Answer or a Numerical Answer
"What is one other cause you support?"
"Rate your donor experience in one word."
"What is your preferred method of communication?"
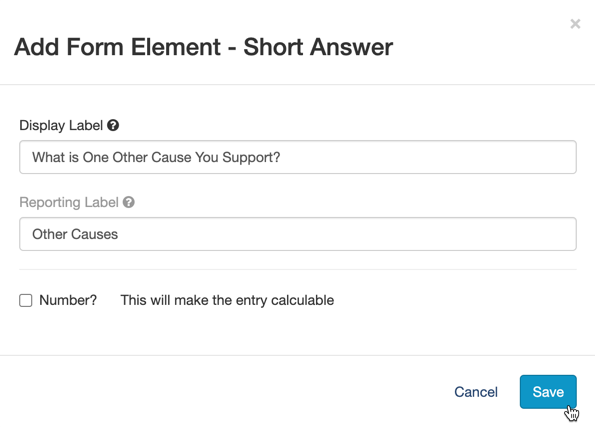
The Short Answer Element can be used to provide a single line of text for your supporter to enter (up to 100 characters), making it great for single response answers.
- Select the Short Answer element from the Add Form Element menu
- Use the Display Label to ask your question. It has a maximum of 255 characters.
- You may want to edit the Reporting Label. By Default, the Reporting Label will be copied from the Display Label, but that may be longer than you desire when you run a report. Click the edit link and make your Reporting Label more succinct.
- If you are looking for a number, (rate us on a scale of 1-10), then you can put a checkmark by Number?
- Note: If you select Number, the Short Answer will still take anything up to 100 characters. Checking the Number option limits the responses to only being able to enter numbers. While not usually useful for a Survey, this could be important if you are using the Calculated Element in your forms.
- Click Save.
Asking Questions with a Longer Answer
- Select the Long Answer element from the Add Form Element menu
- Use the Display Label to ask your question. It has a maximum of 255 characters.
- You may want to edit the Reporting Label. By Default, the Reporting Label will be copied from the Display Label, but that may be longer than you desire when you run a report. Click the edit link and make your Reporting Label more succinct.
- Click Save

Other Elements to Consider
Checkbox: Consider adding a checkbox for your supporters to acknowledge how their answers will be used. This can also be handled with an Agree to Terms element if you want to provide a link to your terms and conditions page on your website.
Images and Videos: Surveys tend to be long lists of just words and boxes to fill in. Consider making your survey more interesting by including images and/or videos to break up the monotony of the questions.
Continue to add survey questions, images, instructions and inspirations to complete your survey.
Reporting and Stewardship
You will need to run reports to view the collected information from your form so that you can cultivate the relationship with your Supporters.
And now your Survey is ready to go!