When your donors donate, they will automatically be emailed a receipt of their donation after submitting a gift.
Year-End Consolidated Receipts allow donors to receive a single summary of all their contributions within a year, perfect for tax purposes. This feature allows you to schedule a bulk email to all donors in your account who have made at least one donation using a GiveSmart Fundraise form within a specific calendar year.
Don't want to send a bulk email to all donors? That's okay!
- *NEW* Your supporters can now access their Year-End Receipt by logging in to the Donor Portal.
- Alternatively, if you want to send just one supporter a Year-End receipt, click here.
When Can You Schedule Year-End Receipts?
2025 year-end receipts can be scheduled starting January 2026.
- Receipts for a given year can only be scheduled after that year ends.
- If you schedule year-end receipts before December 31, they will send for the previous year.
Best Practices
- Avoid scheduling too early! Wait until January to ensure the correct year is selected.
- Double-check the year noted in the email subject and message before scheduling.
- Leave the "from" email address blank to improve deliverability. More here.
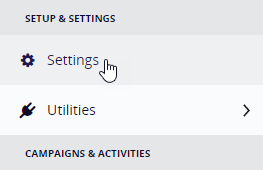
To start, go into your Account Settings, by clicking on Settings under Setup & Settings in the left menu.
Select Year-End Consolidated Receipts on the left.

The section: Configure Email and PDF Attachment is expanded. See below for an explanation of each field.

- Email Address: Receipt emails will be sent "From" this address; however, it's recommended to leave this field blank to improve email deliverability. More here.
- Email Subject: Defaulted to "Your [YEAR] Donations Receipt".
- Email Message: The text displayed in the body of the email (not the actual PDF attachment).
- PDF Message: This text displays at the top of the PDF receipt, below the organization name and logo.
- Contact Number: Prefills the Donor Support Number from the Organization Account Settings.
- Compliance Message: Appears at the bottom of the PDF receipt.
Don't forget to click Save to save any changes you've made!
Preview Email
Select Preview Email to see how it will appear in a desktop view:

Note: The Brand Logo uploaded in your Shared Account Settings will appear at the top of the email.
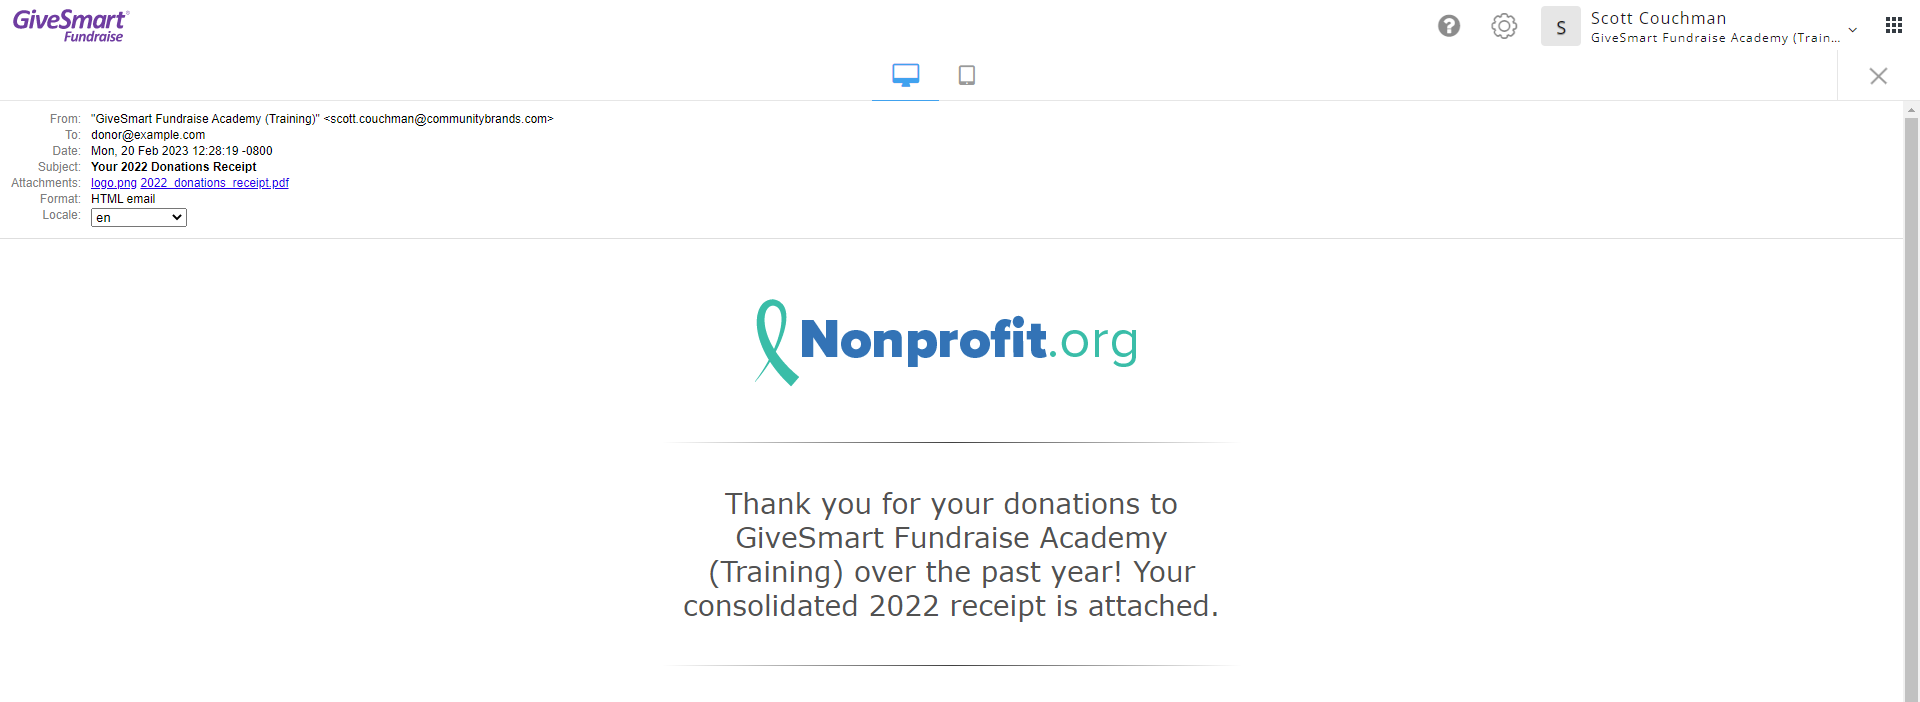
You can also toggle the preview to a mobile view:


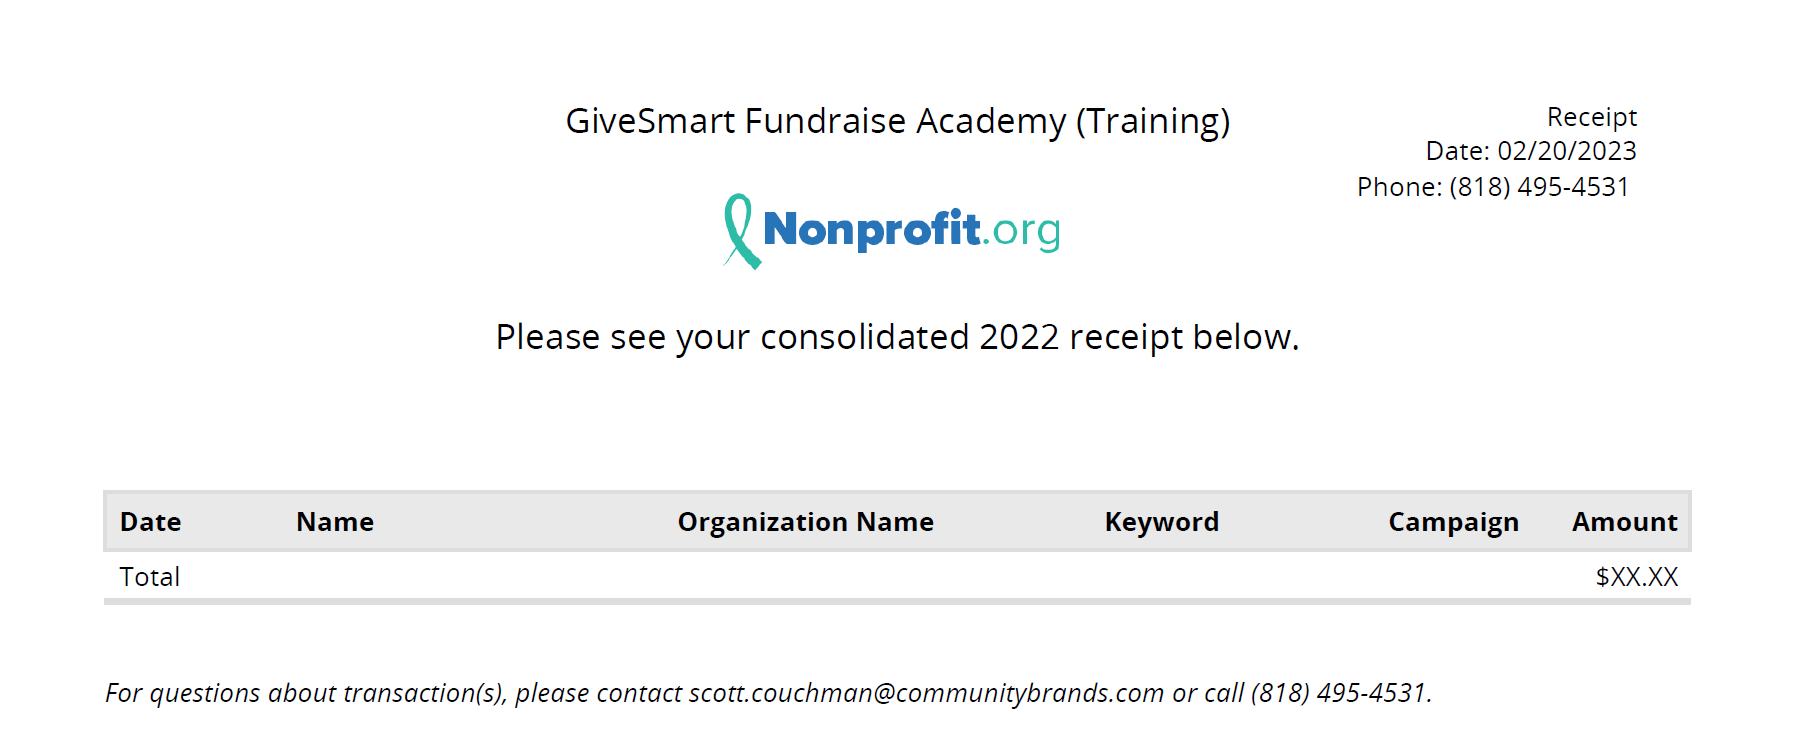
Preview PDF Attachment
You can also preview what the PDF will look like.

Note: The Brand Logo uploaded in your Shared Account Settings will appear at the top of the PDF.
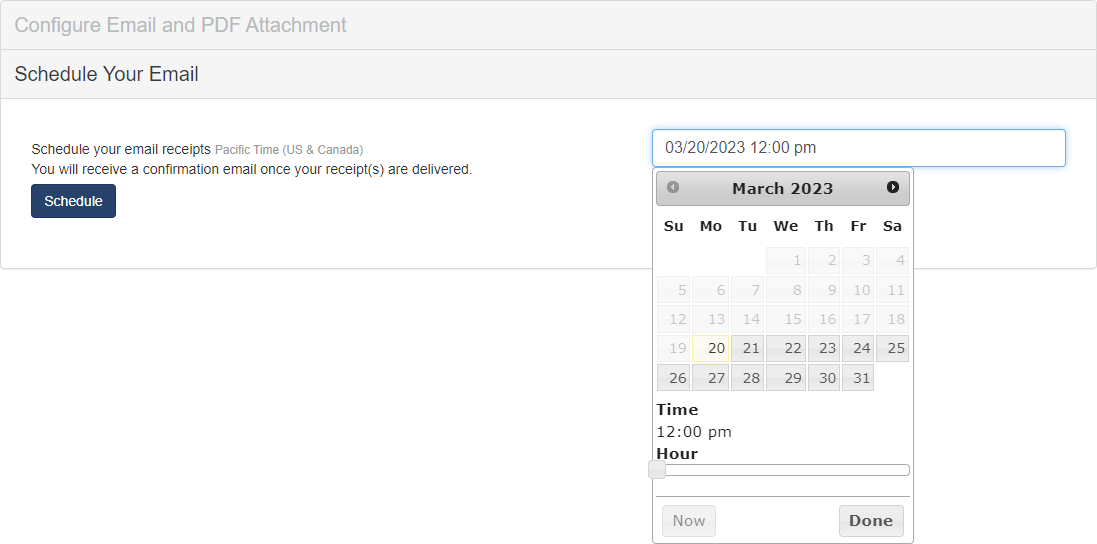
Schedule Your Email
Expand the Schedule Your Email section.
Use the calendar picker to choose the appropriate date and use the slider to choose the hour you would like to send the emails. Click Done when you have the desired Date and Time.
The currently scheduled date and time will display in the section.
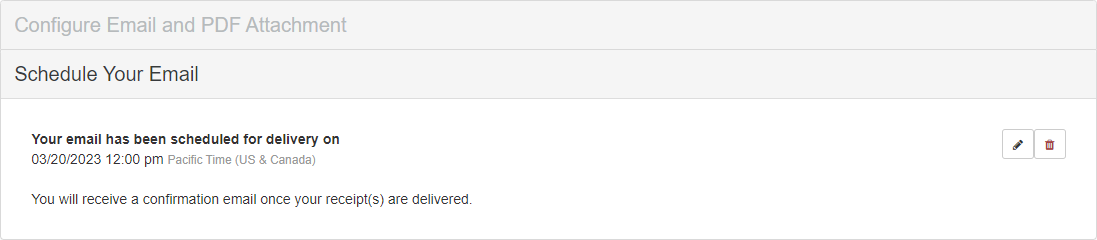
To edit the date/time, click the Pencil icon on the right. Select the Trash icon to delete the scheduled email.

Adjust the date/time and click Update to save the changes. Otherwise, click No, I'll keep my current schedule to cancel the change.

Once the receipts are sent and delivered, a confirmation email will also be sent to the info email established in the Organization Account Settings:
