GiveSmart Donor CRM allows you to efficiently merge potential donor contacts in the module. Review potential duplicates at different risk levels and compare and select contact information to retain prior to merging, providing you the ability to ensure accurate and organized donor records.
To locate the Merging Center, click Data Import & Review from the left navigation and scroll to the Check for Duplicates and Changes section.
There are 3 options to choose from:
- Manually Search for Duplicate Contacts
- Quickly locate known users
- Review Potential Duplicate Contacts
- Allow Donor CRM to perform a scan of all contacts and identify potential duplicates
- Check Name Changes from Automated Imports
- Review donor name changes that occurred through the automated data sync between GiveSmart Events and Fundraise
Search for Duplicates Manually
To manually search and review donors, select Manually search for duplicate contacts container. This option is typically used when there is a known duplicate that needs to be quickly located and merged.

Search for the contacts via First/Last Name, Email or Phone.
Once located, select the checkbox next to the contacts that need to be merged.

Click Bulk Actions, and select Merge (Select 2 Contacts) from the dropdown. Once selected, click the Review for Merge button. 
Review the contact information available on the 2 profiles, and select which information should become the primary contact information on the merged profile. Once complete, click Merge.

Review Potential Duplicate Contacts
Perform a scan of all contacts for review. Select the Review potential duplicate contacts container. This option is typically used after an event, after the 1st time a campaign is ran on a new GiveSmart module and is recommended to be periodically reviewed to ensure contact information remains accurate and organized.

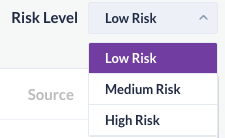
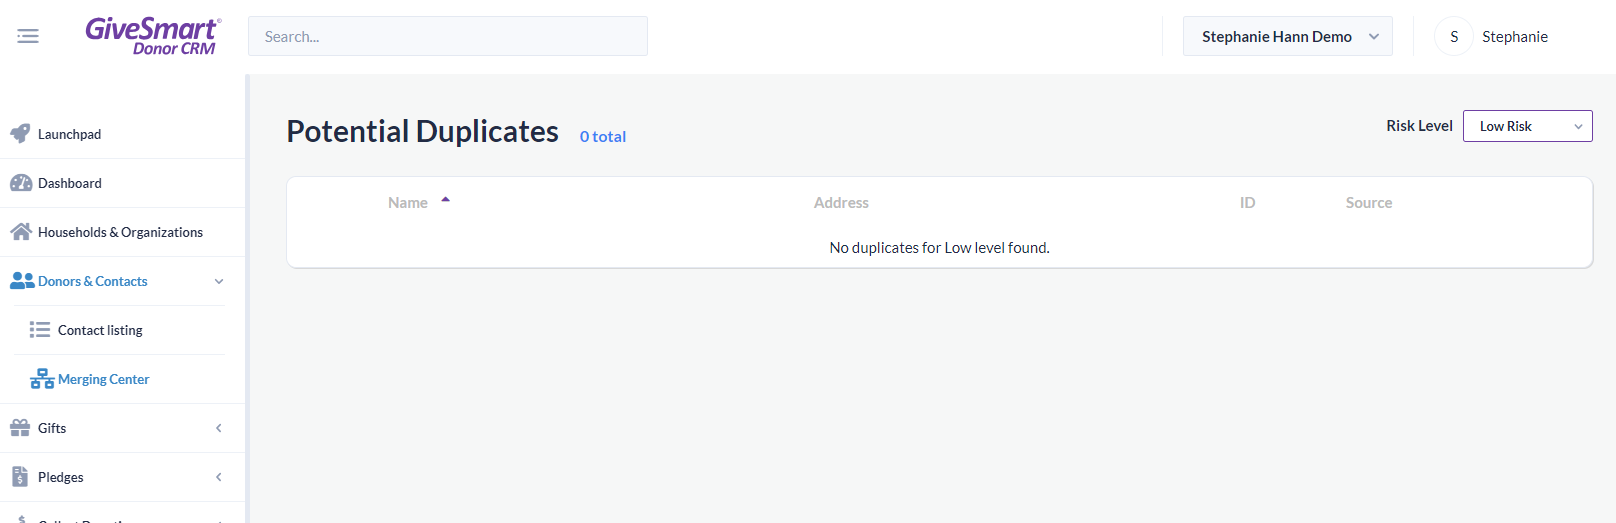
Once selected, Donor CRM automatically scans all records to locate potential duplicates and places them into Risk Groups (Low, Medium, High). The landing page will default to the Low Risk group. To change risk groups, select the dropdown in the top right and select a risk group from the dropdown.
A potential duplicate is placed into the different risk groups based on the amount of information that matches between the profiles.
- Low Risk
- Potential duplicates in the Low Risk group are your most likely candidates for being a true duplicate record as their contact information is most closely matched
- To fall into this risk group, contacts must satisfy any of these criteria:
- First Name + Last Name + Email
- First Name + Last Name + Phone
- First Name + Last Name + Address1 + Postal Code
- Medium Risk
- Potential duplicates in the Medium Risk group have a slightly less chance of being a true duplicate record. Most commonly referenced here are familial relations.
- To fall into this risk group, contacts must satisfy any of these criteria:
- First Name + Last Name
- First Name + Email
- Last Name + Email
- First Name + Phone
- Last Name + Phone
- High Risk
- Potential duplicates in the High Risk group have the least likely chance of being a true duplicate record, but have a small piece of shared contact information
- To fall into this risk group, contacts must satisfy any of these criteria:
- Phone
Review a potential duplicate
To review a potential duplicate, select a contact from the list.
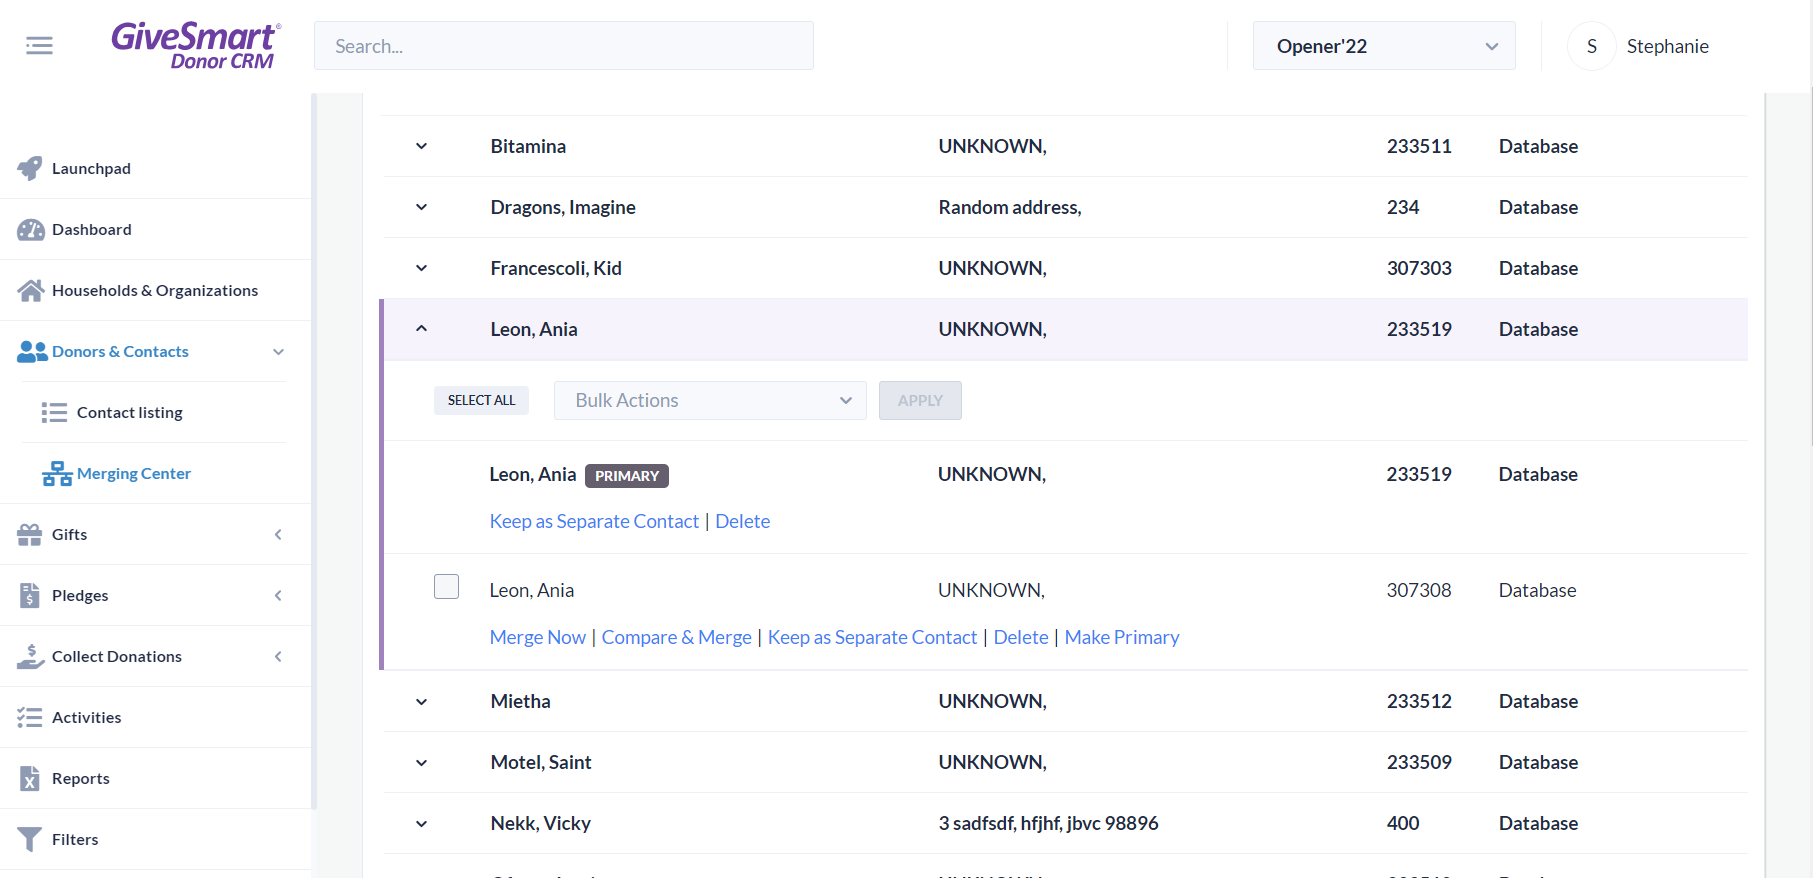
There are multiple options for handling this potential duplicate: Merge Now, Compare & Merge, Keep as Separate Contact, Delete and Make Primary.
Merge Now
Merges the 2 contacts without comparing the data. The information listed on the Primary contact becomes the contact information for the merged profile, and differing information from the secondary profile is appended. Once this option is selected, a confirmation popup will appear, allowing you to confirm this merge. After the contact is merged, it will be removed from the potential duplicate list. 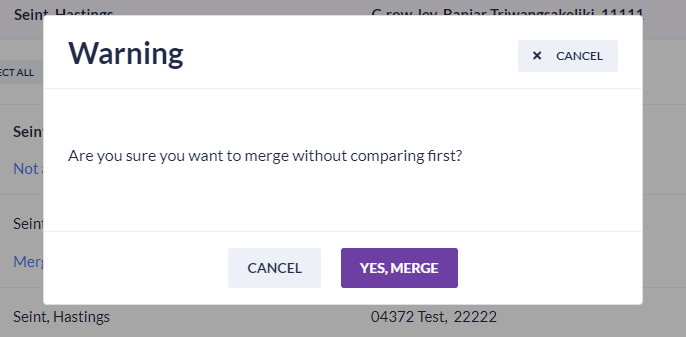
Compare & Merge
Allows you to compare the contact information between both profiles to select the primary contact information for the merged profile. If this option was selected incorrectly, you have the option to Keep as a Separate Contact. Fields that have the same information or information listed only on 1 profile will not be able to be selected, as this information will pass directly to the merged profile. Once the contact information has been reviewed, select Merge to complete this action. After the contact is merged, it will be removed from the potential duplicate list.
Keep as Separate Contact
If you've identified that 2 contacts are not a duplicate and should be kept as a separate contact, selecting this option will allow both records to be retained, and will remove them from the potential duplicates scan in the future. A popup will appear, allowing you to confirm this action.

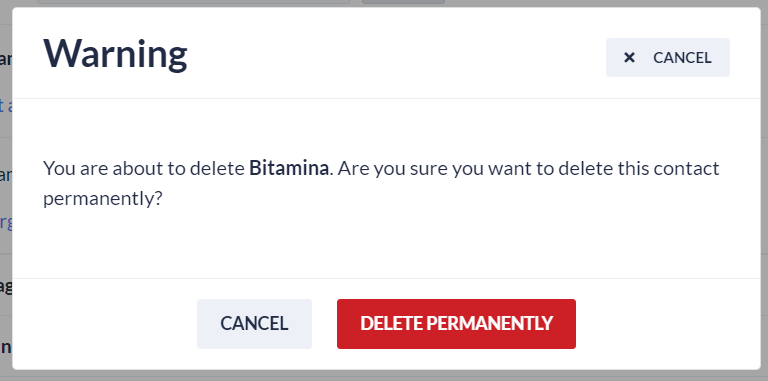
Delete
By selecting Delete, this will permanently delete BOTH records from Donor CRM. This option should only be selected if you want to fully remove all record of this user from Donor CRM. A popup will appear allowing you to confirm this action.
Make Primary
This will change the primary contact for that record. There is NO pop up warning confirmation, but if changed incorrectly the previously marked Primary Contact can be assigned as the Primary again. This option does not merge the profiles, allowing this profile to continue appearing in future scans.
Create Group
This allows you to create a new Household or Group for individuals who may share contact information or last name, but are not duplicate records.
No duplicates to review
If there are no potential duplicates to review in a risk category, it will be indicated on that page.
Check Name Changes from Automated Imports
When a donor's name is changed in GiveSmart Events or Fundraise, this will automatically update the name on the associated donor profile in Donor CRM. When this occurs, all admin will receive an email and a popup will appear the next time you visit Donor CRM. 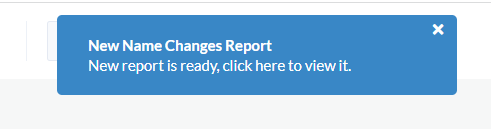
To review a list of name changes that occurred during an automated data sync, select the Check Name Changes from Automated Imports container.

Select Download Excel to view the details of the name change.

In the Excel file, Column B will indicate the name that was listed prior to the name change, and Column C indicates the new Name which has been applied.

To change a name back to the original, or to make further modifications, locate the module source in Column D (in this case GiveSmart Fundraise), proceed to that GiveSmart module to make any name changes.
NOTE: Changing the name in Donor CRM will not prevent the name from being changed during the next automated data sync. The name will need to be changed in GiveSmart Events or Fundraise to ensure the name is reflected properly.